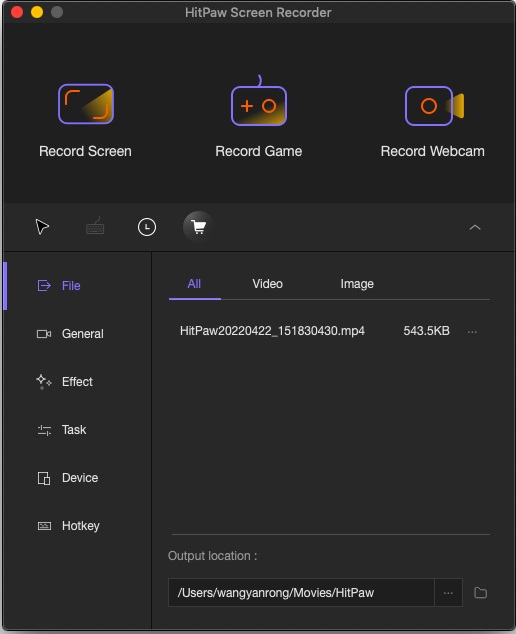
Step 01 To begin, download and install HitPaw Screen Recorder on your computer.
[Solved] How to Record Video on PowerPoint on Mac

Whether you’re a student, teacher, entrepreneur, or employee in any firm, you often need to give PowerPoint presentation to convey the message clearly. Even more useful is recording your PowerPoint presentation for future purposes, making it easy to be shared with anyone, anytime.
Because of this, we will introduce you to the 3 most popular tools to record video narration PowerPoint Mac. Give it a read and find out which solutions is best for your needs.
Part 1: Record PowerPoint on Mac with Microsoft Official Way
Many people are unaware of the fact the Microsoft PowerPoint comes with a built-in video recorder. Using this feature, you can make a robust recorded presentation without any effort. What’s even better is the free availability of PowerPoint slideshow recorder for all users.
Check out the below steps to record slide show PowerPoint Mac with video with Microsoft PowerPoint:
-
1
Launch the PowerPoint slide you need to record. Head to Slide Show - Record Slide Show.
-

-
2
Then, enable the audio and video options from the corresponding dropdown arrows.
-

-
3
Now, hit “Play or Red icon” to begin recording, Use the same option to Preview it anytime. When you’re done recording, hit the Stop icon to end it.
-

-
4
If you want to re-record, simply click on the Delete icon (at the left of Record) to remove the existing record. Then, start a new one.
-
5
Users can also draw in real-time. For that, right-click the slide and go to Pointer - Options - Pen.

-
6
Finally, hit the Esc key and you’ll see the program automatically applying the recording to your slide.
Part 2: How to Record Video on PowerPoint Mac with QuickTime
Developed by Apple, QuickTime is primarily a video player to stream your clips in high quality. But it can also help you make stunning recorded videos of your PowerPoint presentation. Don’t expect advanced recording features from this program but it can help you record your whole screen or a specific part.
This program is available for free on every Apple product, so you don’t need to worry about the price factor. Check out the below steps to record video on PowerPoint Mac using QuickTime:
-
1
Launch QuickTime on your Mac. From its main interface, go to File - New Screen Recording.
-

-
2
Now, hit the dropdown arrow next to the Record icon. Select your microphone to record your voice and then adjust the volume of your audio recorder.
-

-
3
Hit Start and adjust the screen area that you want to record. The program will begin recording your slides.
-
4
When your recording is finished, click the Stop button to get out of presentation mode. You’ll enter the editing interface where you can cut the unwanted parts.
-

-
5
Finally, go to File - Save, and enter a name for your recorded video in QuickTime or .mov format.

Part 3: The Easiest Way to Record Video on PowerPoint Mac
When it comes to the easiest way to record video narration PowerPoint on Mac, then HitPaw Screen Recorder stands out. It is a professional tool for recording anything on your screen in any resolution you want including 1080 and 4k.
What’s more, you can export the recorded video in multiple video formats including MP4, MKV, and more. Additionally, you get advanced features such as picture in picture recording and scheduled recording. Thanks to its light-weight, HitPaw Screen Recorder works perfectly even on low-end PCs and doesn’t produce any lag while capturing high-end games.
With all the impeccable recording features it provides at a user-friendly price, HitPaw Screen Recorder is a go-to choice for millions of users to record video on PowerPoint effortlessly.
The key features of HitPaw Screen Recorder:
- Record video PowerPoint Mac in high quality
- Gives you freedom to customize the recording screen
- Recording webcam and games without any lag
- Advanced picture-in-picture mode
- Scheduled recording
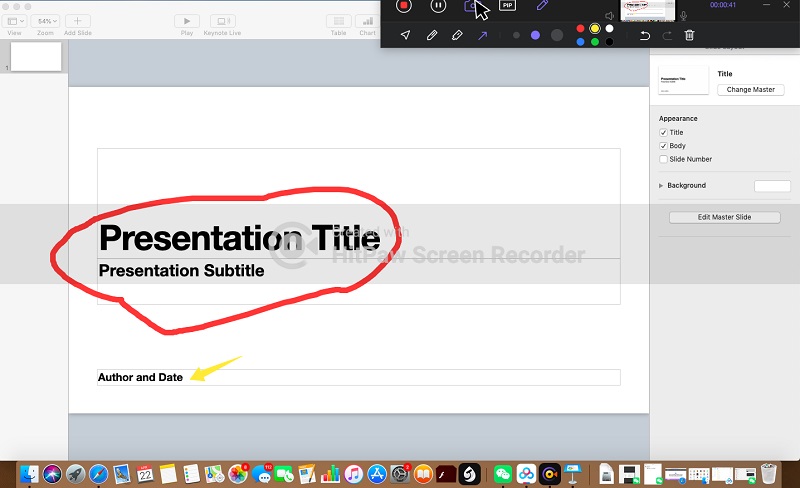
- Real-time drawing to show important details
- Works on both Mac and Windows
How to record video on PowerPoint Mac using this program:
Step 02 On the Home interface, click on Record Screen and adjust the rectangular box to select the screen area that you want to record.
Step 03 Now, start the PowerPoint presentation and hit the Record Screen icon. The program will start recording your presentation.
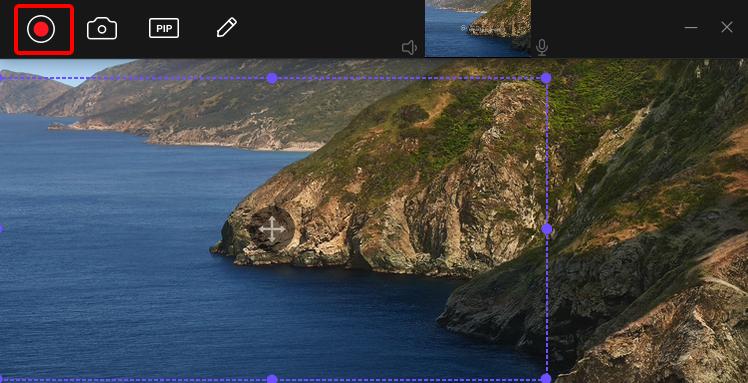
You can pause and play the recording using the same option.
Step 04 If you want, click on the “Draw” icon next to PIP and use your mouse to highlight important details.
Step 05 Finally, hit on the Stop icon to end the recording. Here, you can either trim the unnecessary part or click on “Open Output Folder” to access the output file
Conclusion
Recording your PowerPoint presentation is no longer a tech-savvy procedure. After reading this guide, you won’t have to worry about how to record video on PowerPoint Mac again. All the tools we discussed are simple and easy-to-use.
But as far as our recommendation goes, use HitPaw Screen Recorder to get the best possible output. It comes loaded with tons of basic and advanced recording features that makes screen recording a walk in the park. Plus, you can customize the recording to make it look more captivating and appealing to the audience.







Join the discussion and share your voice here
Leave a Comment
Create your review for HitPaw articles