How to Reflect a Shape in Photoshop in Easy Steps
Being a photographer is a hard job. From sweating in the sun to taking pictures or freezing in cold weather. But, most photographers claim that they love that part of their job. However, the editing part is something that they abhor. Especially when they have to work with Photoshop.
But, there’s no need to worry. In this article we will take a look at how to reflect a shape in Photoshop. Read on to find more about how to reflect an image in Photoshop.
1. [Step-to-Step Guide] How to Reflect a Shape in Photoshop
Photoshop is an effective tool that you can use for Photoshop reflection. It does look intimidating at first but once you get the hang of it, it’s an easy ride from there.
Here is how to make a reflection in Photoshop.
- The first step is to look for a photo that you want to edit. It can be anything from a house, a car or even your friend.
From the options, choose the rectangle marquee tool and then mark the parts that you want to reflect in an image.

- After that, you need to press Press Ctrl/Cmd+J to add the reflection to a meeting later. Make sure to use the perfect combo of Press Ctrl/Cmd+J. Otherwise it won’t work.
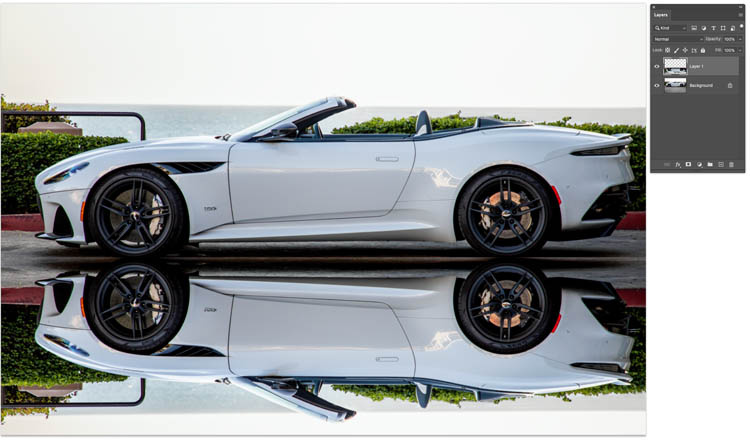
- After that, click Press Ctrl/Cmd+T in order to do a free transform. Now, you need to right click on your house and select flip vertically.
Now you need to drag the floor layer right under the object to make it look good.

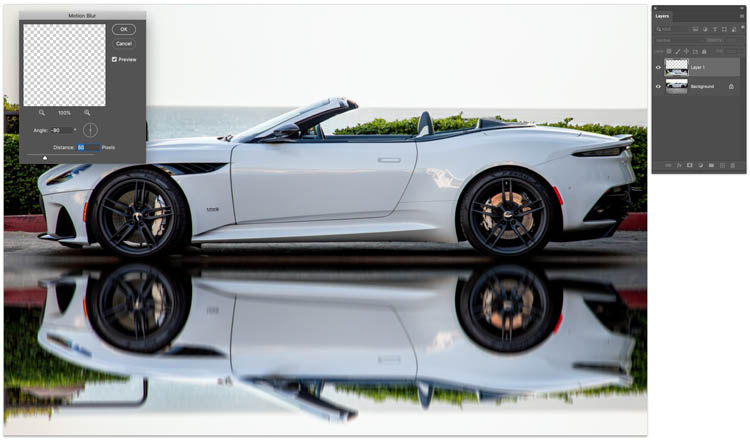
Moving on, you need to select Filter then choose Blur and then click on Motion blur. After that, you need to select the angle as 90 degrees.

- You can also add variations to the reflection. For a faded variation, choose the layer mask button from the options.
- After that, select the gradient tool and then set it at the foreground. Now you need to enter D to adjust the colors.
Now, just drag the reflection so that it looks flattering.

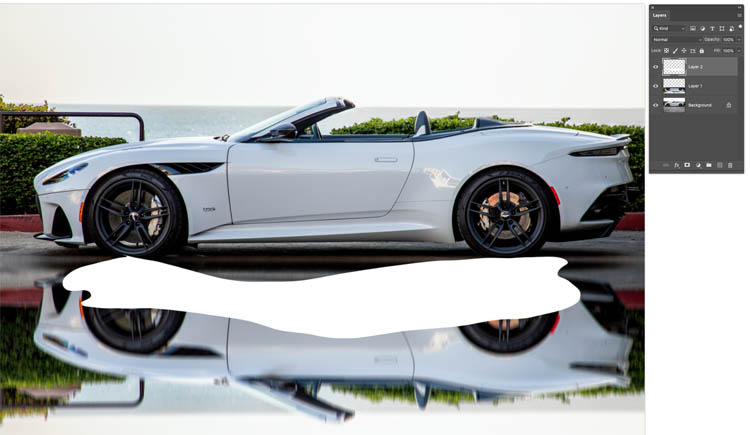
- Moving on, you can also do the puddle variation. For this, use the lasso tool and select the area that you need as a reflection. Make sure to make the selection in the shape of a puddle.
Add a new layer and then add a background color. After that, press Cmd+Delete for mac. And Ctrl+Backspace for Windows.

- After that, drag the puddle layer to the place you want. Now, click alt/option and start to move the cursor. When the cursor starts to turn into a cursor. Click from your mouse.
- Now, select filter blur and then Gaussian Blur. Using this you can soften the edges of the reflection to make it look better.
You can also lower the opacity of the blur according to your liking.

2. [Bonus Tip] HitPaw AI Photo Enhancer to Help You One-click Enhance & Sharpen Your Photo
If you are not satisfied after the result of how to make reflection in Photoshop. There is no need to worry as you can also enhance your image to make it look way better than the original result. Although there are many tools available in the market. But, not every tool is fit for the job. This is why we have got the perfect solution for your problem.
The HitPaw Photo Enhancer is a one click AI based tool that will help you enhance your images in a matter of a few seconds.
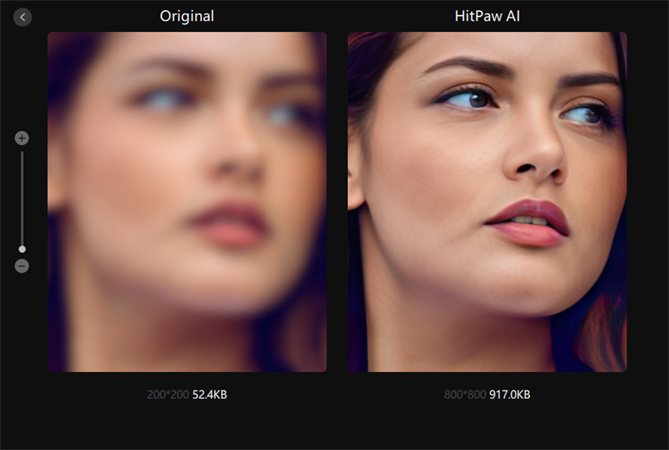
There are many features that make it the best tool for your business. For example, you can use the one click enhance feature to enhance your images. Other than that, there’s also a batch enhancement feature available that will help you get done with bulk work in minutes.
Moving on, you can also customize the size of your images based on your liking. This tool is available for both Mac and Windows so you won’t have to worry about changing devices. There’s also an app for the android users.
- Super fast processing
- Reliable tool
- Batch enhancement
- One click solution
Now that you know why the HitPaw Photo Enhancer tool is the best solution to your problem. Here is how you can use the tool.
-
Step 1.The first step is to download the HitPaw Photo Enhancer tool from the button below
-
Step 2.Using the choose images button, upload the image

-
Step 3.There are a total of 4 AI models available at your disposal. Choose the general model for this case

-
Step 4.You can also preview the effect to ensure that you are satisfied with the results
-
Step 5.Once you feel like you are done with the edit, press export to save the image on your desktop. Now you can use the picture in whichever way you like
Conclusion
Reflection Photoshop is an easy to use method to make your photos look better. However, not everyone knows how to remove reflection in Photoshop. But in this guide you can find the answers to your problem. Other than that, if you feel like your photos are lacking that extra touch - all you have to do is use the HitPaw Photo Enhancer to get the job done. HitPaw Photo Enhancer mobile app






Home > Photo Tips > How to Reflect a Shape in Photoshop in Easy Steps
Select the product rating:
Joshua Hill
Editor-in-Chief
I have been working as a freelancer for more than five years. It always impresses me when I find new things and the latest knowledge. I think life is boundless but I know no bounds.
View all ArticlesLeave a Comment
Create your review for HitPaw articles