How to Record Screen and Audio with QuickTime Player
Since the increasing popularity of live streaming and online office, the demand for screen recorder software has increased greatly. However, the QuickTime player is still the most popular recorder since it's free. Can QuickTime capture audio while recording screen? This question is a frequently asked question by Mac users. In this tutorial, we'll tell you the answer.
Part 1: Can QuickTime Record Screen with Audio?
Yes, QuickTime can capture the external sound through a microphone while recording the screen; and no, it won't record the internal audio.
Though QuickTime can not record the internal audio, there's still a way out. Keep reading to learn the methods to record audio with QuickTime in different scenarios.
Part 2: How to Record Screen and Audio with QuickTime
1. Record Screen and Internal Audio with QuickTime
There is a trick for QuickTime Player screen recording with audio, so if you're searching for a way to record the screen and internal sound of Mac with QuickTime, then you have to opt for this method. First, you have to download Sunflower software.
Note
Note
Recently, some users report that this method did not work for them though, you can still have a try. Or you can go for other methods below in this post directly.
Soundflower is a free system extension that lets you channel audio from one application to another. By emulating the interface to audio devices, it allows any audio application to send and receive audio without the need for additional support from the inter-application audio driver. Therefore, it can help to solve the problem of QuickTime screen recording no audio.
How to record QuickTime screen with audio with Sunflower
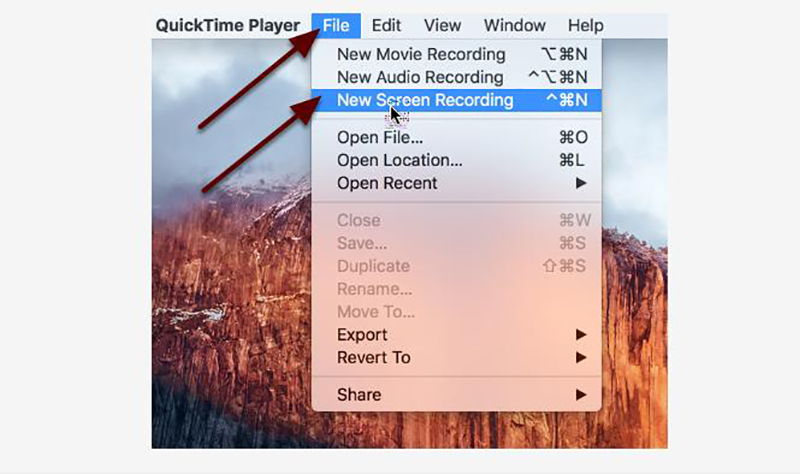
After installing Sunflower software, please restart your device. Then open QuickTime to click on the File on the top menu and choose New Screen Recording in the pop-up panel.quicktime screen recording.

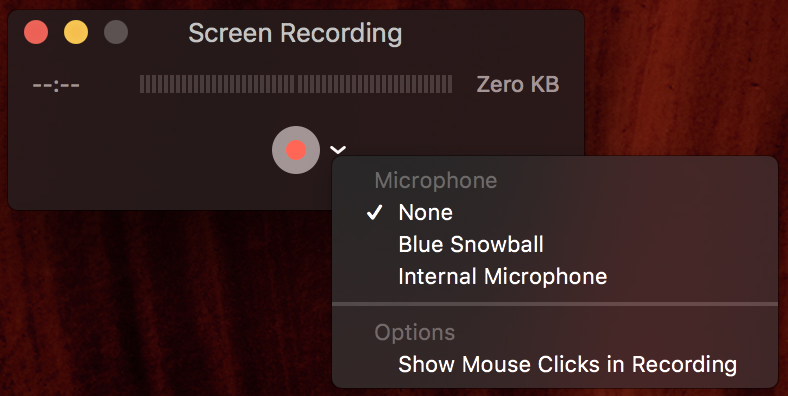
Click the down arrow to the right of the red record button, and you will see the microphone option in the pop-up panel. Choose Sunflower(2ch) option. And you can choose to show your mouse clicks in recording as well.

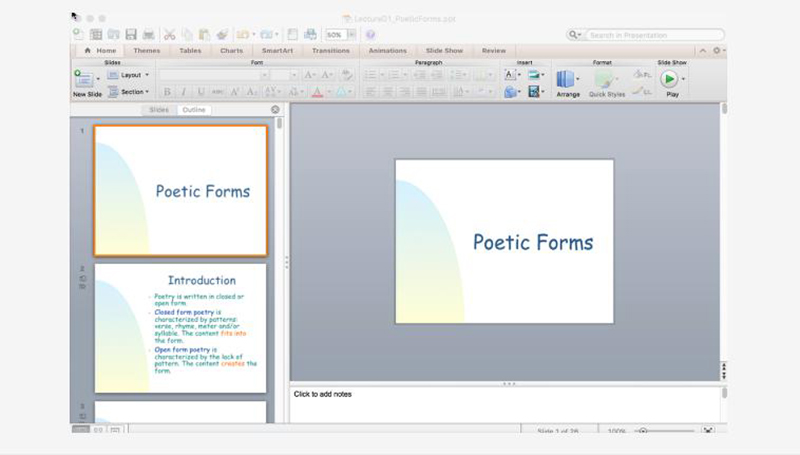
Open the application you want to record.

- Click on the Record icon to start your recording, and click the Stop icon on the top menu if finishing.
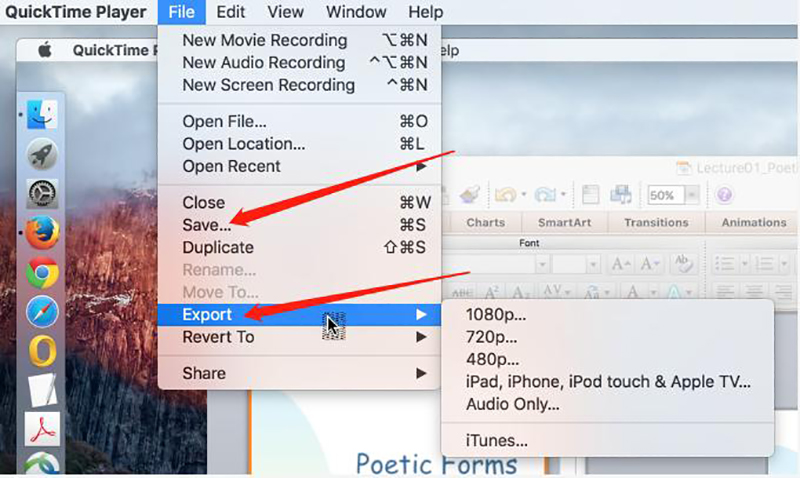
Click Save or Export option to save your recording video.

2. Record Screen and Microphone(External) Audio with QuickTime
If you want to record an online lesson, you may want to include your voice. This method will tell you how to do this:
- Open QuickTime Player, go to File > New Screen Recording. A recording window will appear.
-
Click the down arrow to the right of the red record button, and choose Internal Microphone.

- You can start recording after setting it up correctly.
Cons of Quicktime Screen Recording:
- The recording mode is limited. And it only has the basic screen recording functions.
- You have to download other programs on the computer to record the audio from the device, which is commonly complained about by users.
- QuickTime Player was no longer supported by Apple Inc. and lots of security vulnerabilities had no longer been patched, so uninstalling QuickTime for Windows was strongly advised.
- To record the screen with audio from the device, Sunflower software has to be installed as well.
- Time-consuming and user-unfriendly design.
Part 3: QuickTime Alternative: HitPaw Screen Recorder with Audio
For those who want to record screen and internal/external audio easily or record on Windows computers, HitPaw Screen Recorder may be a great alternative to QuickTime. It features a user-friendly interface that allows users to record screen, game, webcam, and picture-in-picture video effortlessly.
HitPaw Screen Recorder is a cutting-edge screen recorder & streaming software. This all-in-one screen recording and streaming software not only can work as a screen video recorder, but also as a live streaming software and virtual camera for video meetings.
The key features of HitPaw Screen Recorder:
Aimed at improving users' satisfaction, HitPaw Screen Recorder has added new features all the time. Here, let's have a glance at its distinctive features.
- Several recording modes are available, namely record screen, record game and record webcam. Besides, you can record picture-in-picture videos as well.
- Amazing Streaming Software: Make your streaming more attractive and engaging.
- Awesome Virtual Camera: Keep your audiences from video meetings focused on you.
- With its user-friendly interface, it is quite easy to use, perfect for new creators.
- Contains a wide range of features, such as customized screen and resolution based on your requirement.
- To stand your videos, live streaming, or presentations out, this good screen recorder offers free templates, virtual backgrounds, stickers, and texts
Steps to Record Screen with HitPaw Screen Recorder:
Here are the simple steps to record screen with HitPaw Screen Recorder, follow them and begin your work.
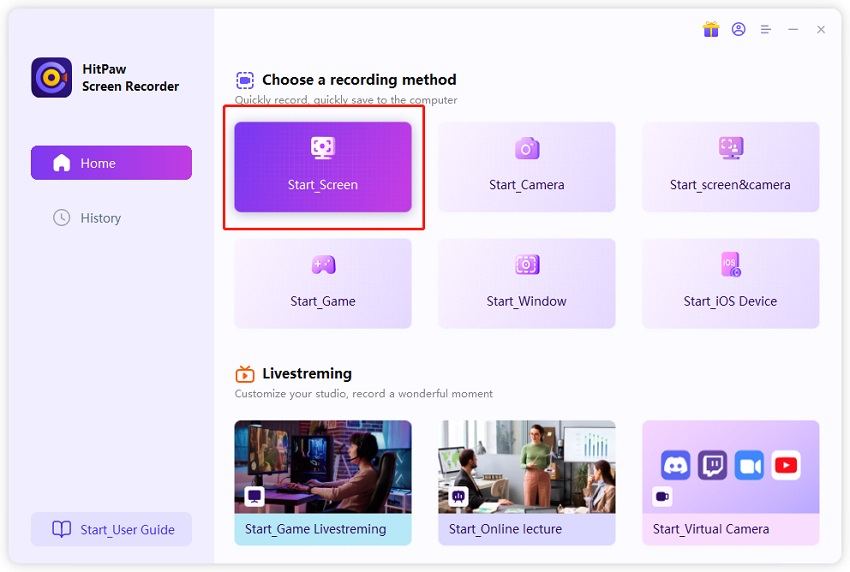
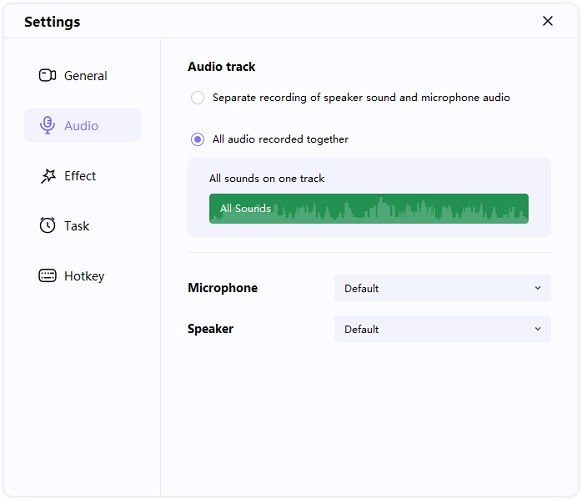
Step 02 Launch the application and choose one recording mode. From the home interface, you will find 6 options. To record screen, click on "Screen". If you want to show your mouse cursor and keystrokes, you can go to the Settings to choose Effect. If you want to record with audio, you can click the Device in the Settings.
Step 03 Click to Select Recording Area. You can either choose full screen by pressing the Space bar or custom recording area by long clicking. You can scale and move the recording window according to your own needs.
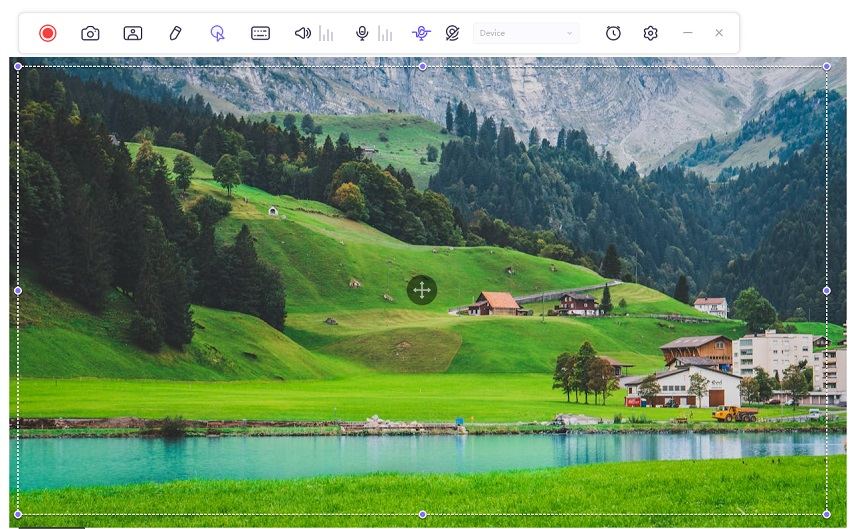
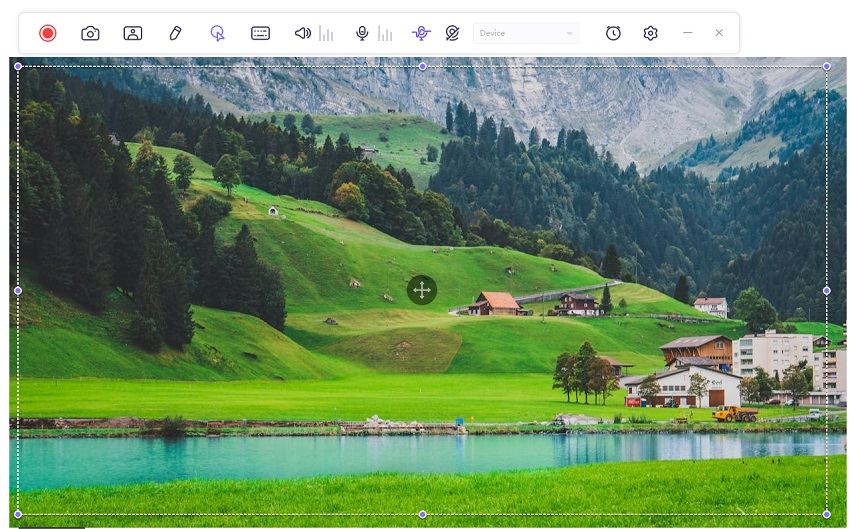
Step 04 Click the red Record button to start your recording. Click it again and the Pause button will come out. You can also choose the PIP function and take a screenshot when recording.
Note:
You can click the camera icon to quick screenshot.
You can also click on the PIP icon to quickly switch to Webcam recording or picture in picture recording.
You can click the speaker and microphone icons to disable the audio if you don't want to record the audio while recording the screen.

Step 05 Click the red button again to stop recording, the software will end the recording and give you a quick option to trim the recorded video. It's on the bottom right corner of the screen. You can click the play icon to preview and cut the video to the length you need. If you don't need to edit the video, you can simply click the icon of right side to open the output folder and check the video.
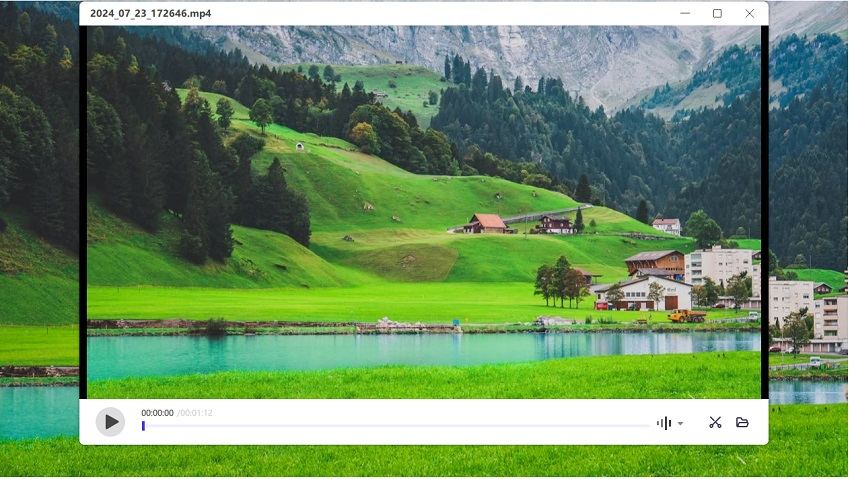
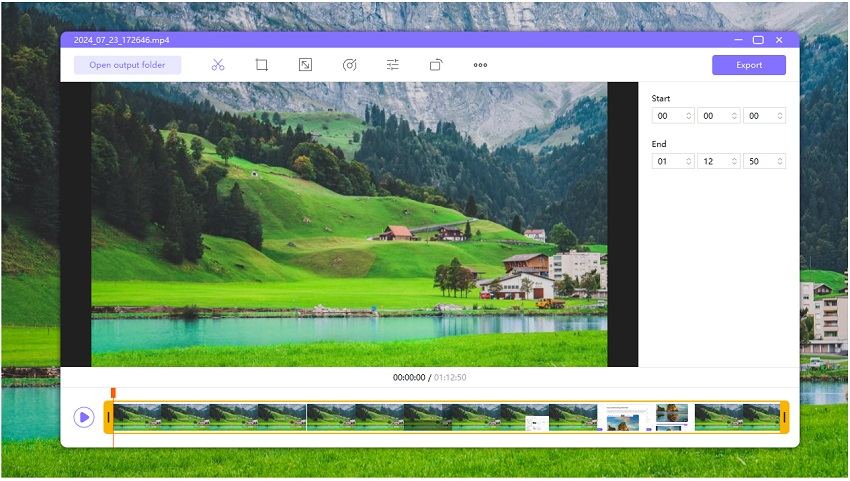
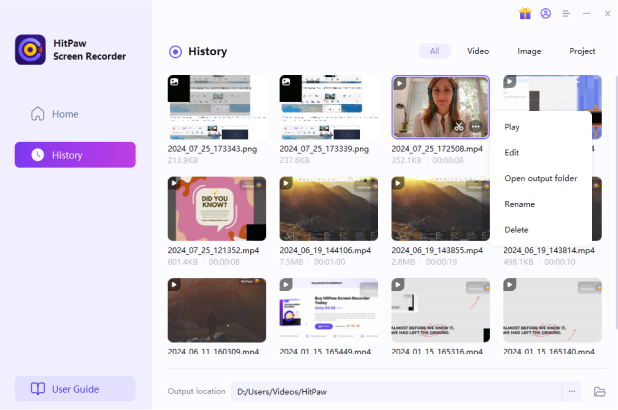
Or you can go to the home interface and click "History" to find your screen video. Right-click the mouse to select to edit, open the output folder, rename or delete the video.
Part 3. FAQ
Where is QuickTime screen recording saved?
When you use QuickTime recorder, your output video is automatically saved to your Documents folder, but you can change the destination of your video. Just click Options before you start recording, choose another location, and then browse your computer to choose where you want to save the file. If you forget to do this step, open the Finder window and search for screen recordings. The latest recorded video should be the one you are looking for, and you can rename and relocate it for easy access later.
Conclusion:
In this article, the way to use QuickTime Player record screen with audio has been shown.
While QuickTime player screen recording has impressive features that let you record your screen, it has many limitations. HitPaw Screen Recorder is highly recommended. This all-in-one screen recording and streaming software stand you out in the live streams, video conferences, lessons, presentations, games, etc. It will not let you down.





Join the discussion and share your voice here
Leave a Comment
Create your review for HitPaw articles