[Full Detailed] How to Use Gimp Remove Object from Photo
Removing distractions or undesirable elements from a photo can greatly improve its overall look and feel. With some careful selections and the right tools, Gimp makes it possible to seamlessly erase objects as if they were never there.
In this guide, we will walk through the steps for gimp remove object from photo. We will also discuss some tips for blending your edits and making them look natural.
Part 1. What is GIMP used for?
GIMP (GNU Image Manipulation Program) is a free and open-source raster graphics editor used for image retouching and editing, free-form drawing, image composition, and converting between different image formats.
Some common uses of GIMP include:- Photo retouching - Removing blemishes, dust, objects, red eyes, etc. from photos
- Image editing - Cropping, resizing, color correction, brightness/contrast adjustment
- Making memes, collages, and graphics - Adding text, shapes, and effects
- Basic drawing and painting - Using brushes, pencils, eraser, and text tools
- Designing simple graphics and logos - Combining vector and raster tools
- Converting file formats - Opening and exporting images in different file types
Part 2. How to Use Gimp Remove Object from Photo
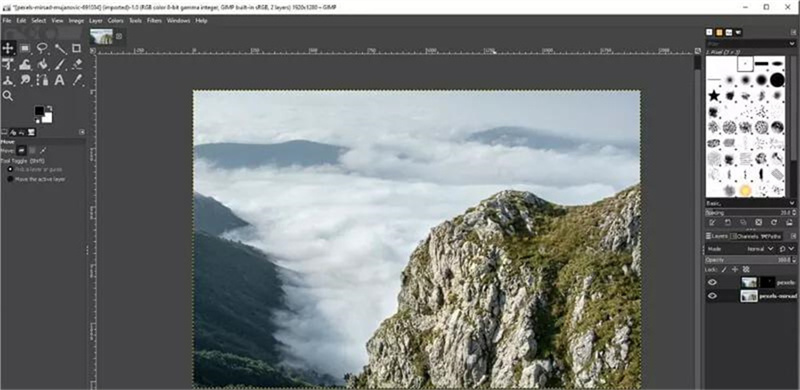
Removing unwanted objects from photos is a common task in photo editing. With some careful selections and retouching, you can make it look like that distracting object was never there. In this tutorial, we'll walk through how to cleanly erase objects from images using the free program GIMP. Here is gimp how to remove object from photo:
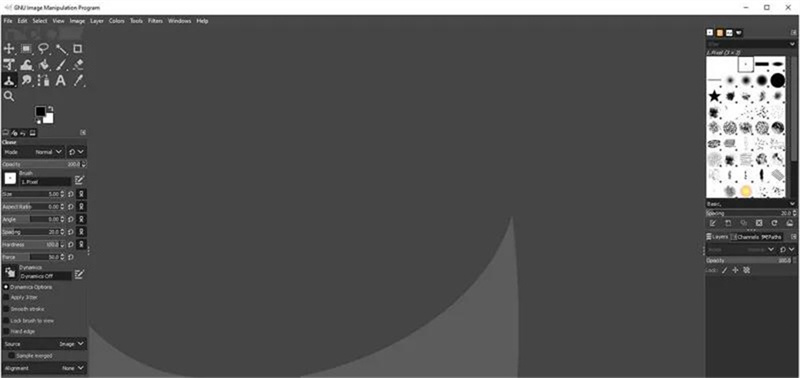
1.First, download and install GIMP if you don't already have it on your computer. Launch the program so the editing interface is open.

2.Next, find and open the photo that contains the object you want to remove.
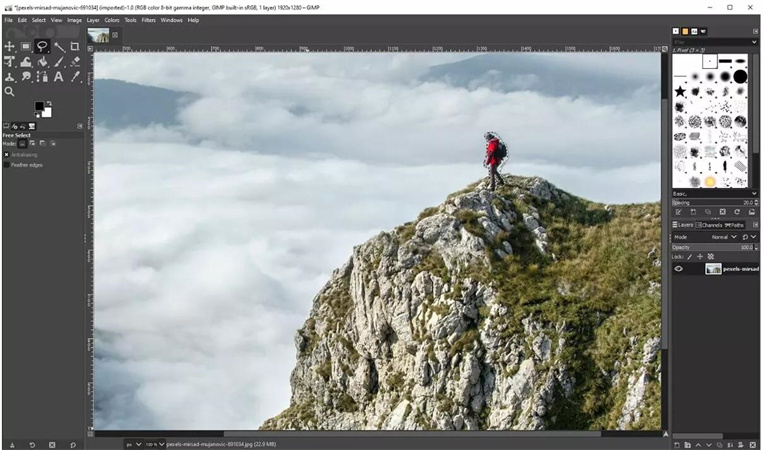
3.Now, select the "Free Select" tool from the toolbox. Use this to trace around the outline of the object you want to erase.

4.To remove the selection, we'll use layers. Click "Duplicate Layer" in the bottom right to make a copy of your image.

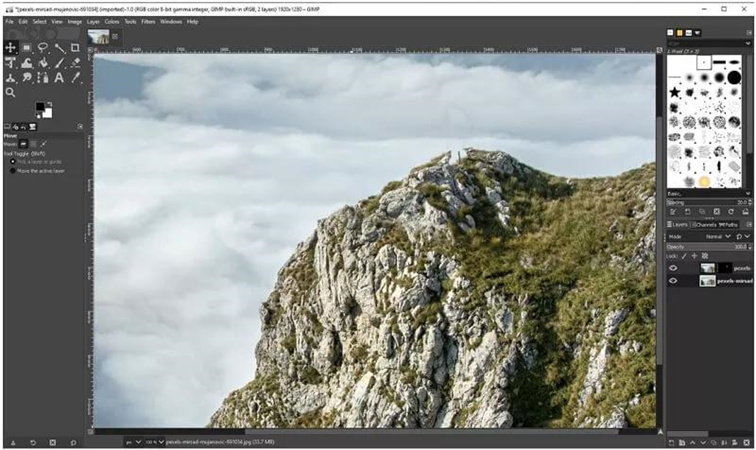
5.With the top layer still selected, choose the Move tool and drag the layer over a bit so that the object is no longer inside the selection on the bottom layer.

6.Go back to the bottom layer and right-click on it. Choose "Add Layer Mask" then "Selection" and click "Add." This will mask out the selected object.
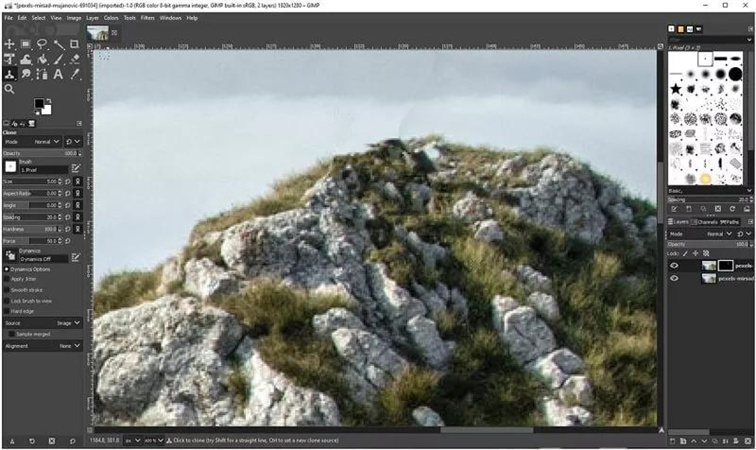
7.At this point the photo probably looks a little odd with parts missing. Grab the Clone Stamp tool to blend the background into the erased area. Sample from nearby sections with similar textures.

8.To finish up, click "Alpha Channel Lock" on the right to lock transparency on the layer. Then save your changes with Ctrl/S.

Part 3. The Best Alternative to Gimp Remove Object from Photo with HitPaw Photo Object Remover
Looking for an easier and more powerful way to erase objects from your photos? HitPaw Photo Object Remover is an AI-powered program that makes removing unwanted people, objects, text, and other elements from images incredibly simple.
If you find manually using GIMP's selection and cloning tools difficult, HitPaw is a great alternative worth checking out.
Features
Here are some of the standout features that make it a great alternative to manually using GIMP:
- Fast and automatic object removal with just one click using advanced neural networks and algorithms
- Smart AI technology precisely detects people, objects, text, and backgrounds for erasure
- Powerful inpainting seamlessly fills and restores the area where an object is removed
- Customizable selection tools like lasso and magic wand to isolate objects
- Background editor can automatically detect and replace distracting backgrounds
- Retouching capabilities can eliminate wrinkles, blemishes, and other facial imperfections
- Batch processing to enhance multiple photos in one go
- User-friendly interface ideal for beginners and professionals alike
Remove Objects
Step 1:Click "Remove Objects" and add the photo you want to edit. You can also drag and drop images directly into the editing box.

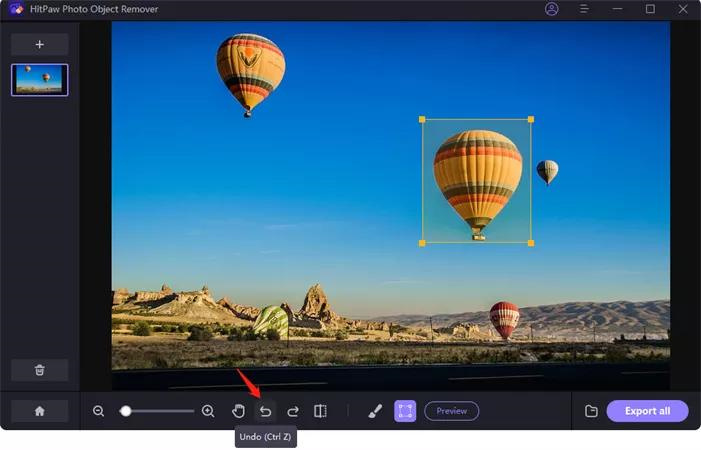
Step 2:Use the Brush or Box Selection tools at the bottom to paint over or draw a frame around the object you want to remove.

Step 3:The selected area will be highlighted. You can refine the selection by adding or reducing the highlighted area as needed. Adjust the brush size for more precision.

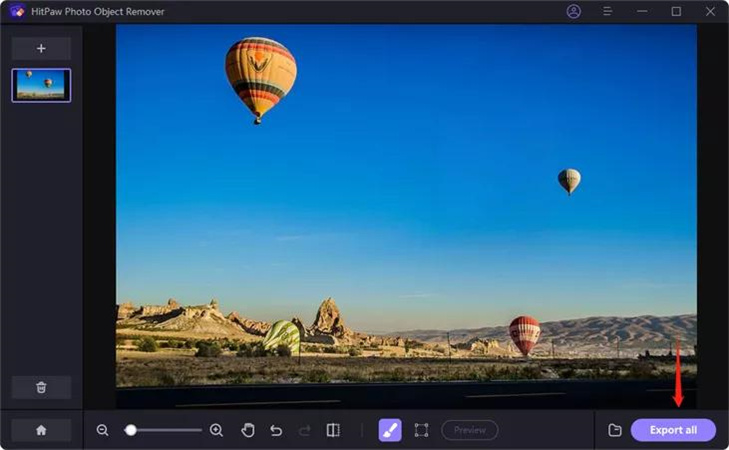
Step 4:Click "Preview" to see the object removed. Browse to select a save location, then click "Export All" to save your edited photo.

Remove and Change Background
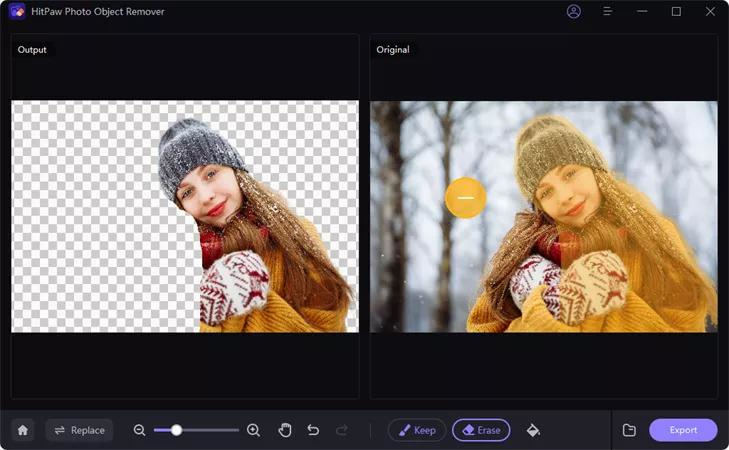
Step 1: Click "Remove Background" and add a photo to edit, or drag and drop one in.

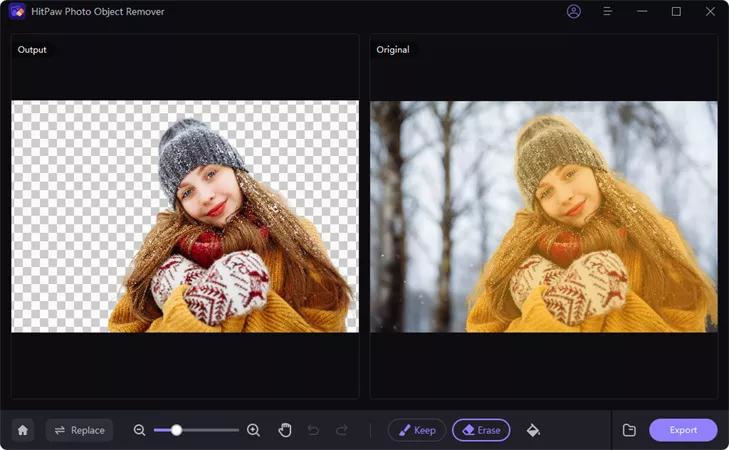
Step 2: The software will automatically detect and erase the existing background.

Step 3: Use the Keep tool to paint over any foreground areas you want to preserve.

Step 4: Use the Erase tool to paint over any additional background areas you want to delete.

Step 5: Select a new background colour to replace the removed background.

Step 6: Preview the results, then export and save your edited photo with the new background.

Part 4. FAQs of Gimp Remove Object from Photo
Q1. How to remove text from image without removing background in gimp?
A1. To remove text from an image without affecting the background in GIMP, I'd recommend using a dedicated photo editing tool like HitPaw Photo Object Remover. Its smart AI can automatically detect and erase text while leaving the surrounding areas intact. This saves time compared to manually using GIMP's selection and cloning tools.
Q2. How do I delete selected items in gimp?
A2. To delete a selected area in GIMP, you can go to the Layers menu and choose Transparency > Remove Alpha Channel. This will delete the selection and make that part of the image fully transparent. Another option is to go to Edit > Clear to fill the selection with the background color. You can also cut or delete the selected area.
Conclusion
GIMP provides a free and open-source way to manually remove unwanted objects from photos using its selection tools and cloning capabilities. However, remove object from photo gimp process can be tedious and requires some expertise to get natural-looking results.
An easier alternative for seamlessly erasing objects, people, text, and backgrounds from images is using HitPaw Photo Object Remover. With its intelligent AI technology, powerful inpainting, customizable selection controls, and user-friendly interface, HitPaw makes object removal quick, automatic, and foolproof.







Home > Photo Tips > [Full Detailed] How to Use Gimp Remove Object from Photo
Select the product rating:
Joshua Hill
Editor-in-Chief
I have been working as a freelancer for more than five years. It always impresses me when I find new things and the latest knowledge. I think life is boundless but I know no bounds.
View all ArticlesLeave a Comment
Create your review for HitPaw articles