Step 01 Download, install, and launch HitPaw Edimakor on your MacBook.
How to Annotate Video on Mac

You may want to annotate video on Mac for a variety of purposes. For anybody dealing with creating videos on a daily basis, screen recordings and annotations are very crucial. Although Apple MacBook does have a few tools using which you can annotate videos, still there is room for a lot of improvement. You can use the inbuilt annotation tools for Mac like iMovie and QuickTime to add annotations to any videos, the steps of which have been described in detail below. However, there are a lot of other third-party tools available that can do a much better job at this. This article will discuss more about how to annotate on Mac using different tools in depth.
Part 1. What is the Purpose of Video Annotation?
Video annotation is done for a variety of purposes. It offers plenty of benefits and enhances any video to a great extent. Some of the useful benefits of Mac annotation include:
- Easy detection of objects
- Tracking an object becomes simpler
- Object localization
- Person identification
- Product listing improvement
Part 2. Learn How to Annotate Video on Mac in iMovie
iMovie is a great annotation software for Mac which makes adding annotations to videos very easy without needing a lot of expertise. You can follow the step-by-step guide below to know how to add text to iMovie on Mac.
-
1
Launch iMovie and click on “Create New”.
-
2
Select the video you want and then click on “Import Selected”.
-
3
Drag and drop this video on the timeline.
-
4
From “Titles”, select the kind of text you want to iMovie add text overlay.
-
5
Customize your text and place it anywhere you like in the video.
-

By following the above guide, you can easily know how to add text to video in iMovie.
Part 3. How to Annotate a Movie in QuickTime Player
Another great way to add text to video Mac is by using QuickTime Player. You can follow the steps given below to know how to add text to QuickTime video.
-
1
Launch QuickTime Player, and click on “Window”, and then on “Show Movie Properties”.
-
2
Launch QuickTime Player, and click on “Window”, and then on “Show Movie Properties”.
-
3
From the pop-menu of “Add Annotation”, pick whichever annotation you like.
-
4
Enter the selected annotation in the “Value” section of the list.
-

This is how simple it is to annotate QuickTime video on Mac.
Part 4. Screen Annotation Tool for Mac
If there is a video running on your MacBook and you wish to annotate live video on Mac, there is no other better tool than HitPaw Screen Recorder for this. It includes some exciting features like recording area customization, drawing and cursor effect, background video replacement using Chroma Key, monitoring in real-time, PIP size and position customization, scheduled recording, and so much more. Follow the below guide to use HitPaw Screen Recorder.
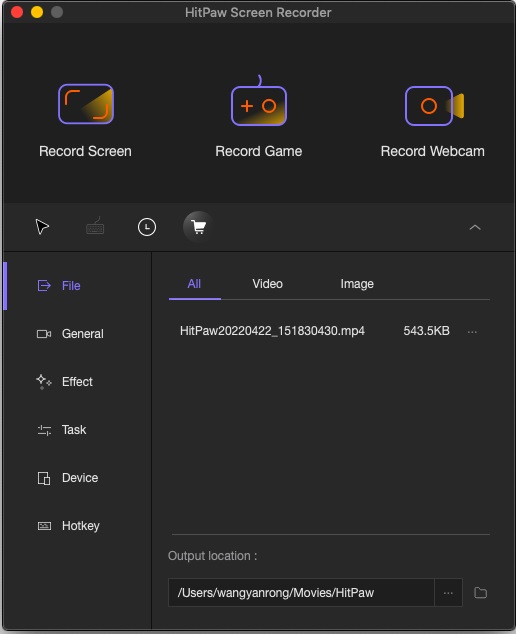
Step 1: Download, install, and launch HitPaw Screen Recorder on your MacBook.
Step 2: On the main interface, choose “Record Screen” and select the area to be recorded.
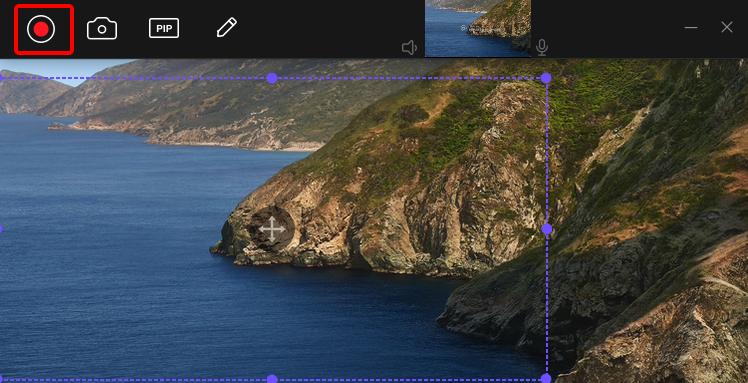
Step 3: Click on the “Record” icon to start recording the screen. You can click on the “Pause” icon to pause the recording or “Stop” icon to stop the recording process.
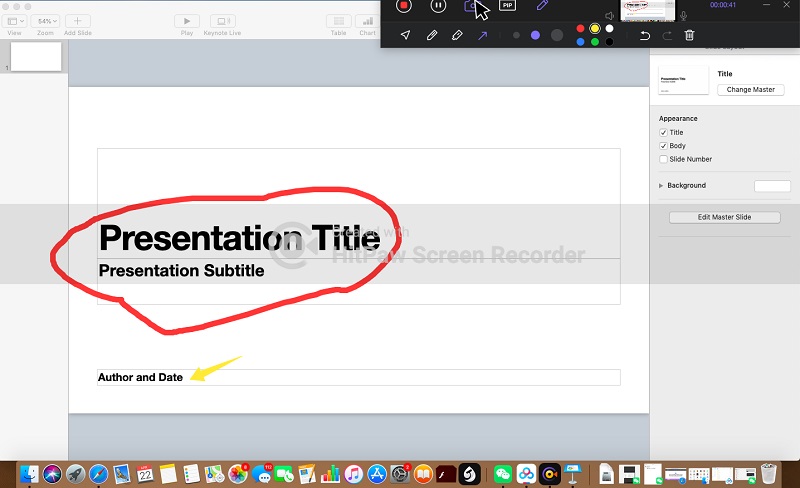
Step 4: You can use the Pen, Highlight, and Arrow options found by clicking on the “Draw” icon to add text, annotation, or arrow on the screen.
Once done, you can edit the video as you like and click on “Export” to store the recorded video at your desired location.
Part 5. Best Annotate App on Mac
If you want better editing options while adding text to videos on Mac, it is recommended that you use third party annotation apps for Mac like HitPaw Edimakor Mac. This is the best annotation app for Mac and can be used to add any text in your video and even edit it as you wish.
Main features of HitPaw Edimakor:
- Supports importing video and adding text, sound, stickers, or transitions to video.
- Change video speed accurately.
- Simple audio editing feature.
- Separate audio and video.
- Export to different formats.
- Annotate video with customize options like adding effects to text, editing text.
You can follow the steps given below to know how you can add annotation to a video on Mac using HitPaw Edimakor.
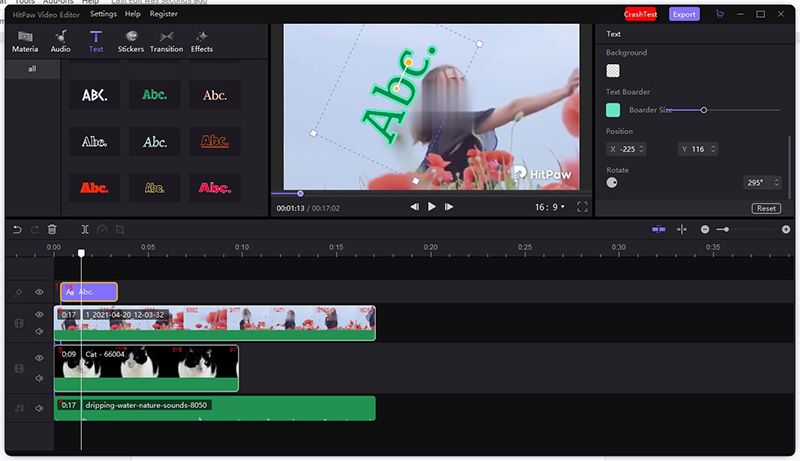
Step 02 Select the video you wish to add the text to and drag and drop it to the timeline.
Step 03 Click on the "Text" icon and select the text effect which you like the best.
Step 04 You can drag this text to the video in the preview section to add it to the video.
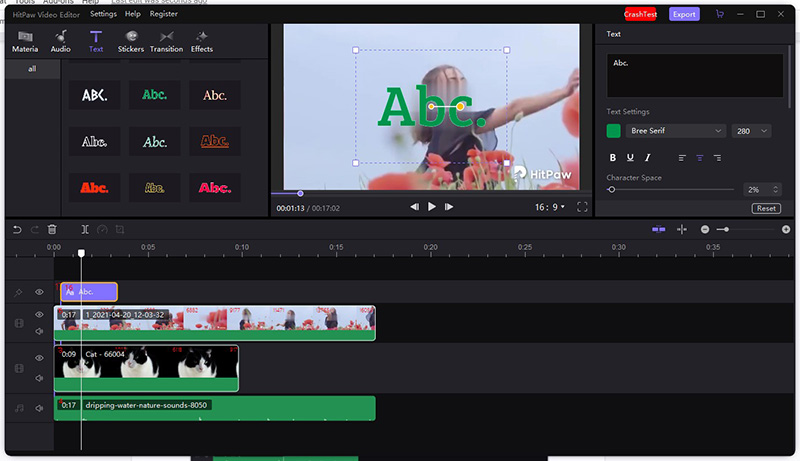
Step 05 You can edit this text by clicking on it to launch the text editor.
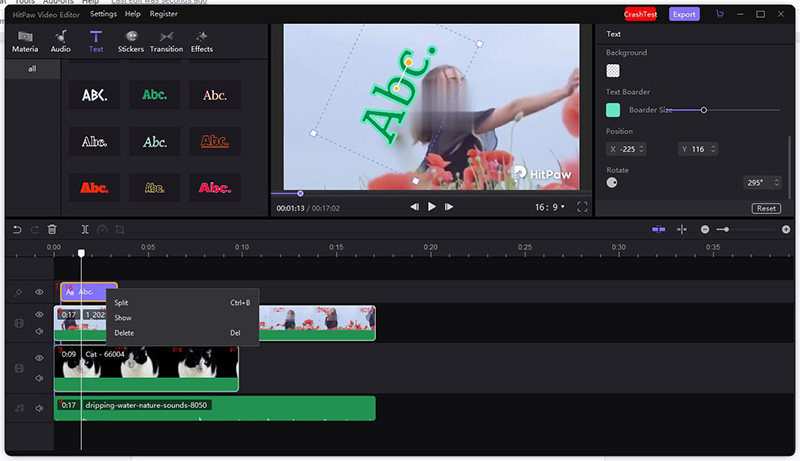
Step 06 You can click on the text and select the “Delete” icon if you have added any text by mistake.
Once done, you can save and export the video to your desired location on your MacBook.
Here is the video tutorial on how to annotate video on Mac with HitPaw Edimakor:
The Bottom Line
The above guide shows you different ways in which you can know how to annotate on Mac. You can use any of the methods given to add annotations to your videos to make them more engaging. When it comes to adding annotations to your video, there is no other better tool than HitPaw Edimakor Mac because it does not allow you to add text, but also supports to add text effects and edit text.





Join the discussion and share your voice here
Leave a Comment
Create your review for HitPaw articles