Step 01Run HitPaw Screen Recorder on your PC.
Step by Step Guide of How to Record a Google Meet with Audio

The last few years have witnessed a remarkable increase in the popularity of Google Meet for hosting virtual meetings. But at times, you need to revisit the discussion or take notes of the meeting. That’s where the Google Meet recording comes in so handy.
If you’re planning to capture your next meeting on Google Meet, but don’t know how to do it, then worry not. In this article, we will cover how to record a Google Meet on your device as well as share the recordings.
Without any further ado, let’s cut to the chase!
Part 1. Who Can Record a Google Meet?
While Google Meet has a built-in recording feature, but this service is not available to everyone. Thus, the first thing we are going to cover is who can use this option.
First of all, users who have a free personal Google account cannot see the Google Meet recording option. Make sure you have any of the below Google Workplace plans to start recording the Google Meet:
Remember that the person who wants to record must be the meeting organizer or within the same organization as the organizer. In addition, Google Meet recording can be utilized only on web browser of your computer.
It is important to mention that you cannot record:
- Live captions
- Other windows opened on your PC
- Any notifications
Now that you know what can be recorded on Google Meet, the next step is to learn how to record Google Meet as a student or manager.
Part 2. How to Record A Google Meet on PC
Recording Google Meet is as easy as it can get. You can start the meeting on any web browser in a matter of seconds. All you need to make sure your computer is connected to an active Wi-Fi connection.
Check out how to record a Meeting in Google Meet on your computer’s browser:
-
1
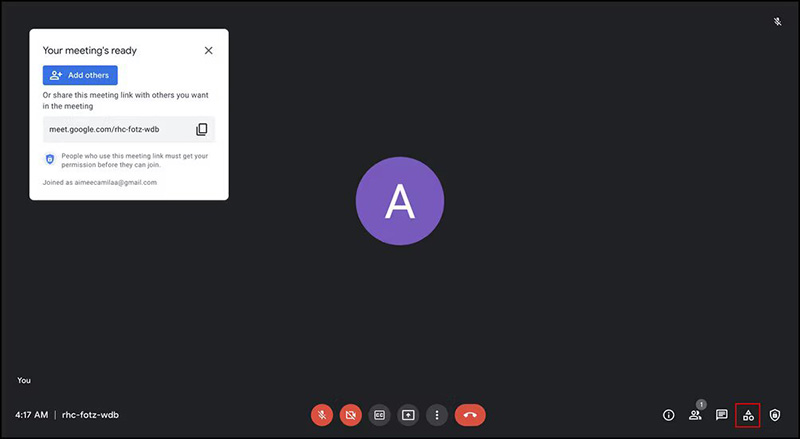
Head to Google Meet to join or start a meeting.
-
2
Hit the Activities icon on the bottom-right of the screen and choose “Recording when you’re reading to start recording”.
-

-
3
Now, click on Start Recording. A conformation window will pop up, Hit Start to get going.
-
4
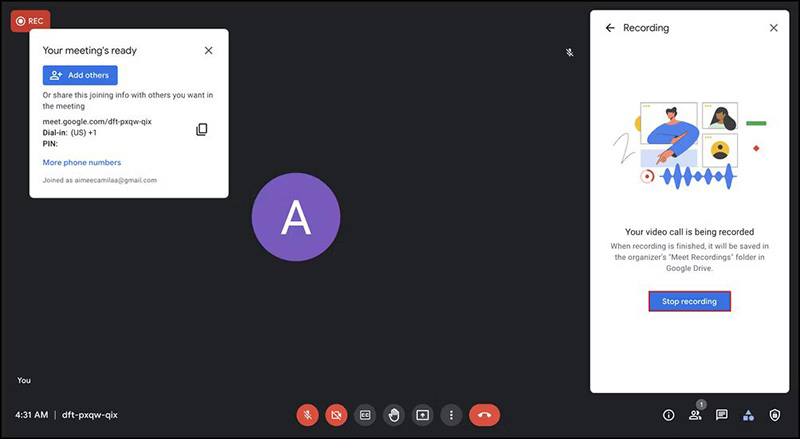
The red button at the top-left corner shows that you’re recording the meeting.
-

-
5
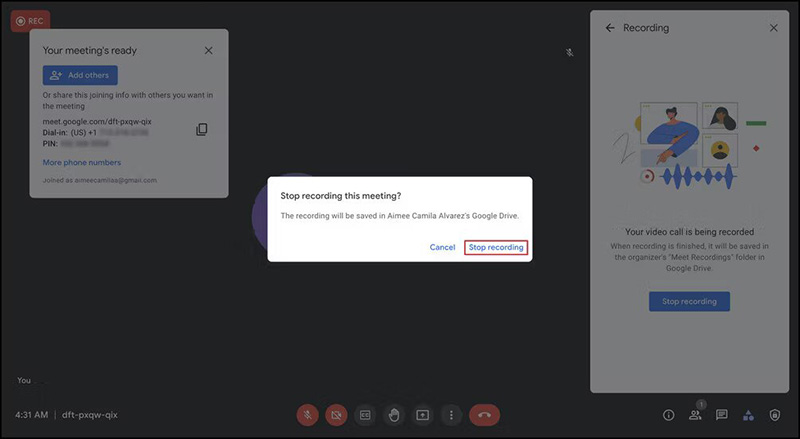
When you’re done recording, hit Stop Recording and confirm by choosing Stop Recording. Your recording will be saved in the Google Drive.
-

And that’s it. Use the above steps whenever you want to capture your Google Meet. But note that the maximum Google Meet recording limit is 8 hours. After that, the recordings session ends up automatically.
Part 3. How to Record A Google Meet on Mobile Phone
3.1 How to Record a Google Meet on iPhone?
The iPhone has a built-in screen recording feature that you can use to overcome Google Meet's mobile recording limitations. Follow these step-by-step instructions to start using your iPhone to record Google Meet sessions anywhere, anytime.
-
1
Open Settings and select Control Center.
-
2
Locate the Screen Recording options and tap on the + next to it.
-
3
Go back to the Home screen and open your Control Center.
-
4
Press and hold the Record button.
-
5
Open the microphone and enable recording by clicking on the microphone icon.
-
6
After the countdown is complete, tap on Start Recording to record your video screen.
3.2 How to Record a Google Meet on Android Phone?
With a few adjustments to your settings, it's easy to start recording Google Meet on your Android 11 device. Follow these instructions to record your Android screen to capture a Google Meet session.
-
1
Open your Quick Settings and select Screen Recorder.
-
2
Select the audio and video recording settings, then select Done.
-
3
Accept Android Screen Recorder requests to access your device.
-
4
Tap on Start Recording.
Part 4. Why I Can’t Record a Google Meet and How to Fix
If you try to record a Google Meet but it doesn't work, it may be because you are not an administrator, or you are not authorised to record meetings, or your plan does not include a meeting recording feature. There are a few things you can do.
Firstly, check that your Google account is set to allow recording. Secondly, make sure that the meeting is not being recorded by anyone else. Only one person can record a meeting at a time. Finally, if you are still experiencing problems, try restarting your computer or device.
Part 5. How to Record a Google Meet without Permission
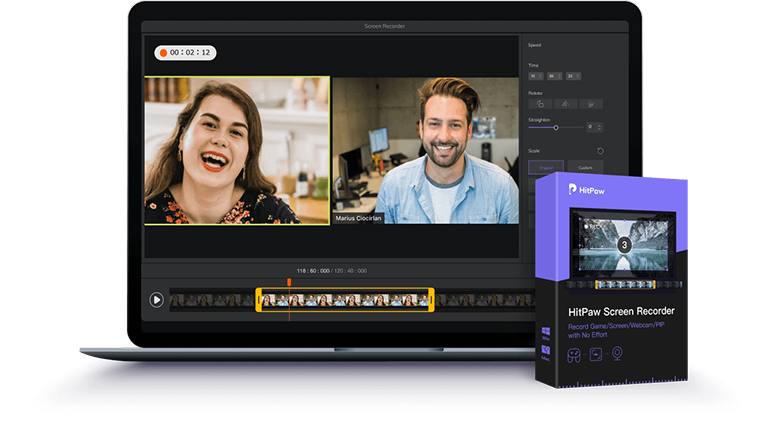
As good as Google Meet is, not everyone wants to subscribe to its premium service just to get the recording feature. Plus, this program offers limited recording functions. If you want more control over Google Meet recording, then HitPaw Screen Recorder is your ideal choice.
Its intuitive interface lets even first-time users to record Google Meet without any hassles. Also, it puts no restrictions on video length or seize whatsoever. Its advanced features include real-time drawing, scheduled or segment recording, screenshots, and more. Not to mention, you can also record games, webcams, and iOS devices in HD.
Advantages of HitPaw Screen Recorder:
- A quick and simple procedure to record Google Meet.
- Allows you to capture the whole screen or a specific area.
- Real-time drawing feature to show important details.
- Set scheduled recording particularly if the meeting is long.
- Very easy to install and use.
Follow the below steps for recording in Google Meet using this program:
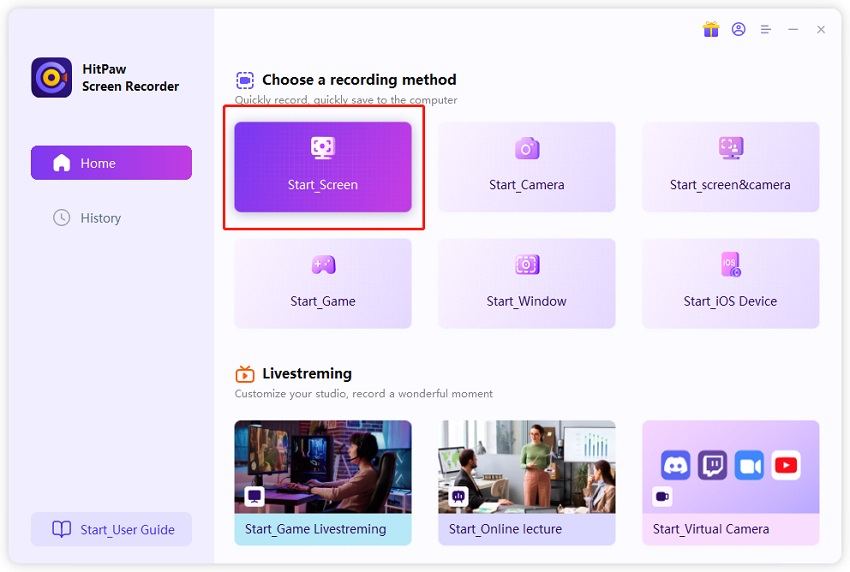
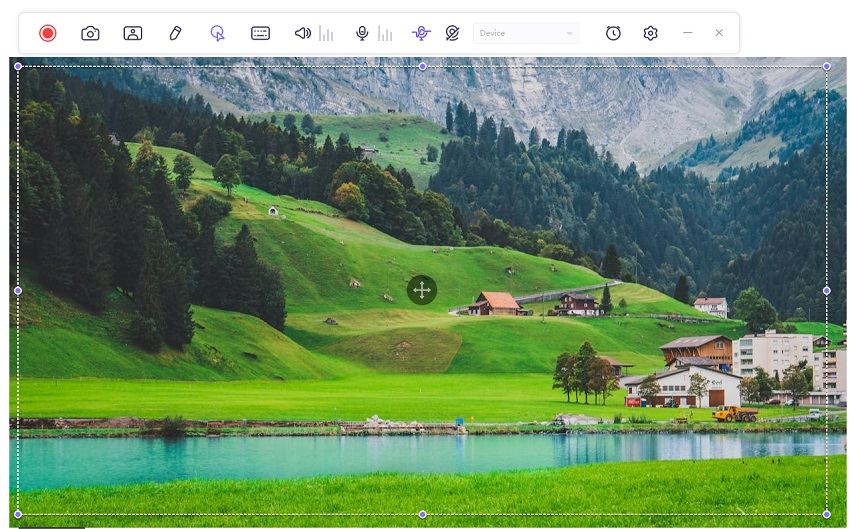
Step 02On its main interface, choose Screen.
Step 03Now, join or begin the Google Meet and adjust the screen recording area of program as needed.
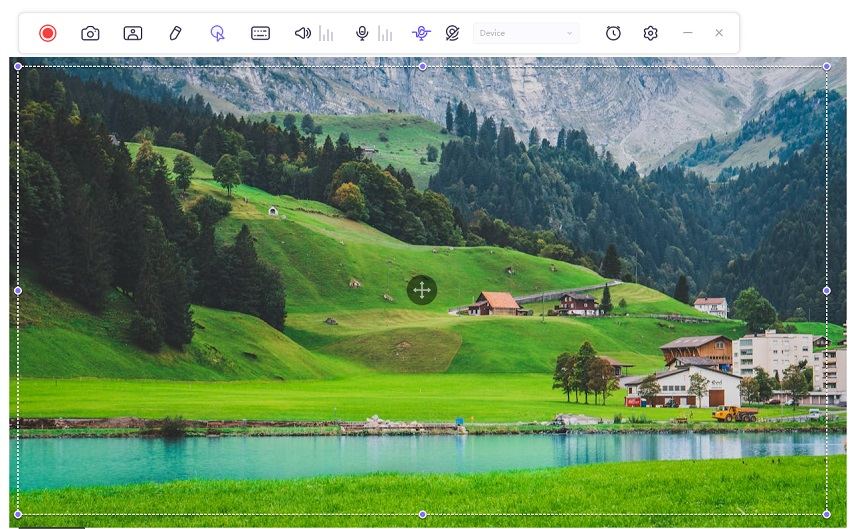
Step 04Hit the Record icon (round red button) to get started.
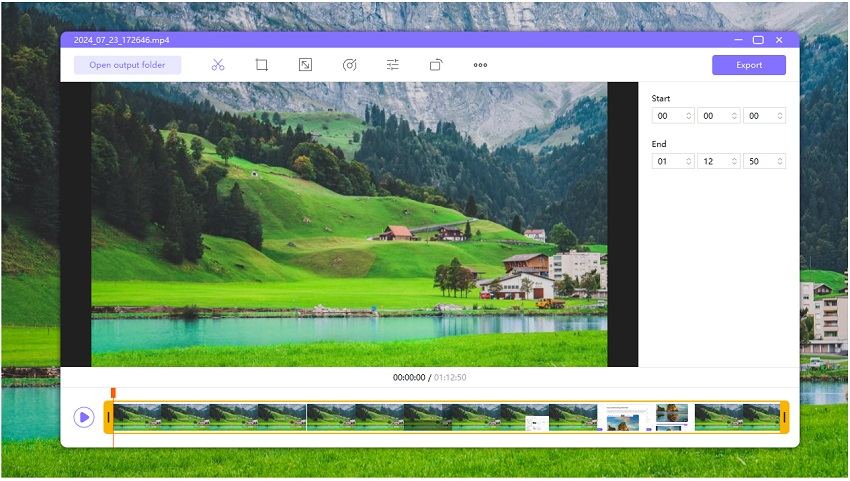
Step 05Finally, click on the Stop icon to enter the editing interface. Here, cut the unnecessary part of the video or access it in the Output Folder.
More FAQs about Google Meet Recording
We have answered a few common queries of users regarding how to record a Google Meet. Let’s give it a read.
1. How to share the recorded Meet
The first thing that comes to mind after Google Meet recording is how to share this recording with your friends or colleagues. Luckily, it takes you just a few clicks to share the recorded Meet with anyone.
For that, follow the below steps:
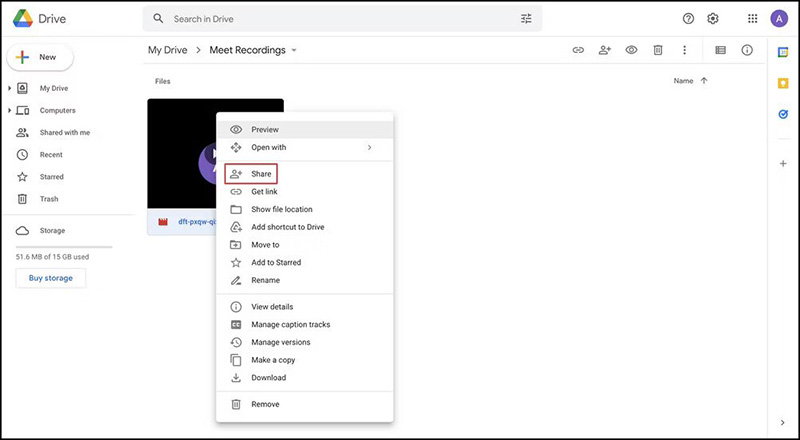
· Head to your Google Drive.
· Click on My Drive on the left tab and select the Meet Recordings folder.
· Once you see the recorded video, right-click it and hit Share.
· Enter the email addresses or names of the people you want to share it with, and then, hit Send.
2. Where are my Google Meet recordings saved?
The recorded Google Meet are saved on your Google Drive automatically. All you need is to open the drive and access the video.
The Final Saying
Hopefully, you won’t face any issue in how to record a Google Meet after reading this article. We provided a comprehensive guide on everything Google Meet recording including who can record Google Meet and what you can record.
This article shows that HitPaw Screen Recorder is the best solution to record Google Meet with ease. It gives you tons of customization options to make your recordings even better. Plus, the same tool allows you to start a live session on Google Meet







Join the discussion and share your voice here
Leave a Comment
Create your review for HitPaw articles