Full Knowledge about How to Remove Blemishes Photoshop
If you’re wondering how to remove a blemish in Photoshop, you’ve come to the right place. This article will discuss tips and tricks that will help you remove blemishes in Photoshop. Read on to explore more about Photoshop blemish removal.
1. [100% Works!] How to Remove Blemishes in Photoshop with 3 Different Tools
For a noob person, removing blemishes in Photoshop can be a tedious task. However, if you’re equipped with the right tools, and have the skills, it takes less than a few minutes to redefine your photos into the perfect versions. There are some tools that will help you with blemish removal in Photoshop.
Spot Healing Brush
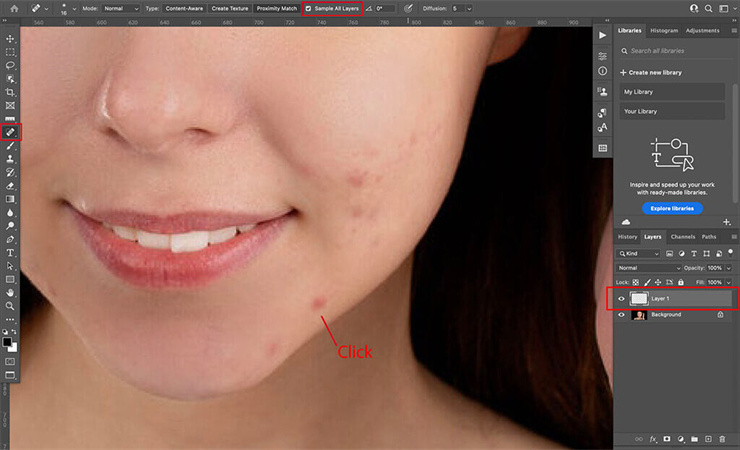
If you are not tech-savvy, then the spot healing brush Photoshop tool to remove blemishes will be your best bet for exploring apps to remove blemishes. All you need to do is set the size and hardness of the brush you want to use. After that, the application will gather all the necessary information from the image and blend it with the rest of the image to produce a stunning result.
Here’s how to use the spot healing brush tool:
- First things first, you will have to create a new blank layer. For this, press on the + icon.
- After this, enable the spot healing brush tool by clicking on the spot healing brush tool.
- Next, click on the sample all layers option.
- From the options, adjust the brush setting according to your preference.
- Hover around the problematic area to remove the blemishes from your skin.
Healing Brush
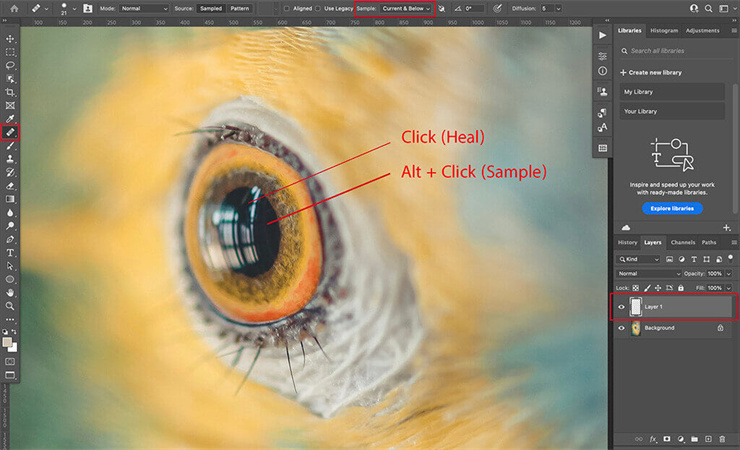
Healing brush works very similar to spot healing brush. However, when you use the healing brush tool, you will have more control over your preferences. The tool will help you choose from where you want the information for the sample. Therefore, you will be able to choose the good parts of your skin as a sample for removing the blemishes.
Here’s how to use the healing brush blemish remover tool Photoshop.
- Click on the + icon to create a new layer in the application.
- From the options, choose the healing brush icon.
- Click on “sample” and choose “current layer” or “current and below,” depending on your preference.
- From the options - choose the brush settings that you need.
- Now, to select the healing area, hold down on the Alt key or Option key (for PC and Mac) and press on the area you want to select as a sample. After that, press on the area with the blemishes to remove them.
Healing Patch
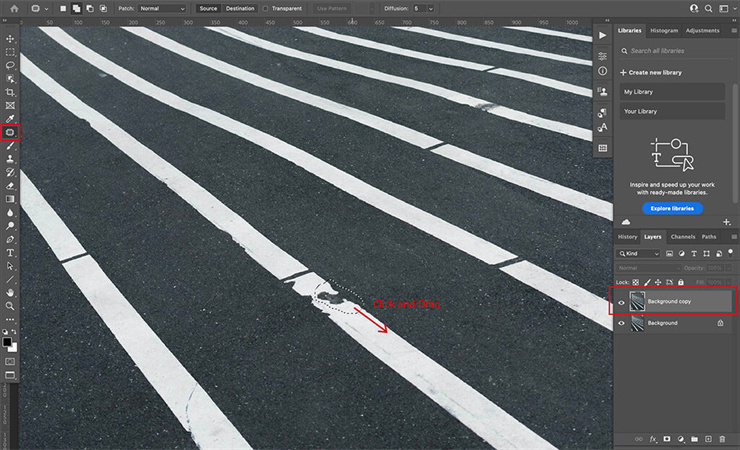
Using the healing patch tool will be your best bet if you’re trying to fix a picture with a larger surface area. It is because the tool does not limit you to the shape of trash. You can select the area you want to work with and get started immediately.
Here is how you can use it:
- The first step is to duplicate the background here. It is because the healing touch told does not work without it. Therefore, you will have to duplicate the background to protect the original image. To duplicate the background layer, press CMD or CTRL+J (For windows and Mac).
- Once you duplicate the layer, it is time to enable the healing patch tool. Just click on the icon that looks like a microchip to do this.
- After you do that, it is time to select a blemish. Just select the area by clicking and dragging on the cursor around.
- First, select a blemish three area so that Photoshop can gather the necessary information. You can check it in the live review. When you are satisfied with the results, let go of your mouse, and the tool will fix the area automatically.
2. AI Blemish Removal: Better and Easier Solution than Photoshop Blemish Removal
Apart from manual blemish remover tools, you can also use AI blemish removers to get the job done within a single click. For example, the HitPaw Photo Enhancerl is an amazing AI blemish remover.
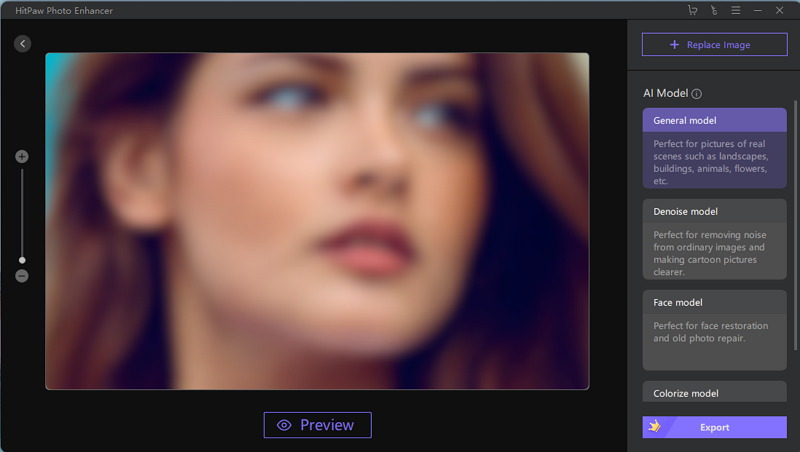
The tool has several features that will help you fix your photos immediately. With the help of HitPaw, You can use 4 AI models depending on your preference. Other than that, if you’re short on time, HitPaw will help you process images in a batch.
And that’s not all; despite enhancing the pictures in a batch, the tool is super fast. Hence, if you are a professional photographer or editor, HitPaw will save you tons of time.
- Uncomplicated interface
- Super fast processing
- Batch processing
Now that we are done discussing the basic information let’s look at how you can use the HitPaw Photo Enhancer to remove blemishes from your photos.
-
Step 1.Download and install the tool by clicking the button below.
-
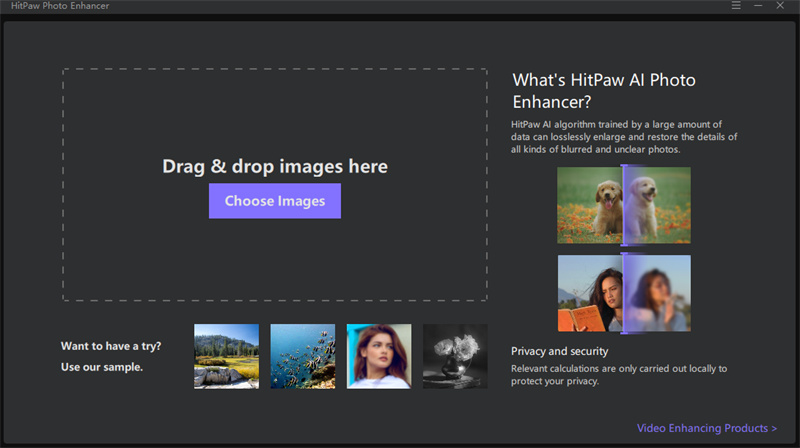
Step 2.Open it up once the software is installed on your computer. After that, click on “choose images” to upload the image you want to enhance.

-
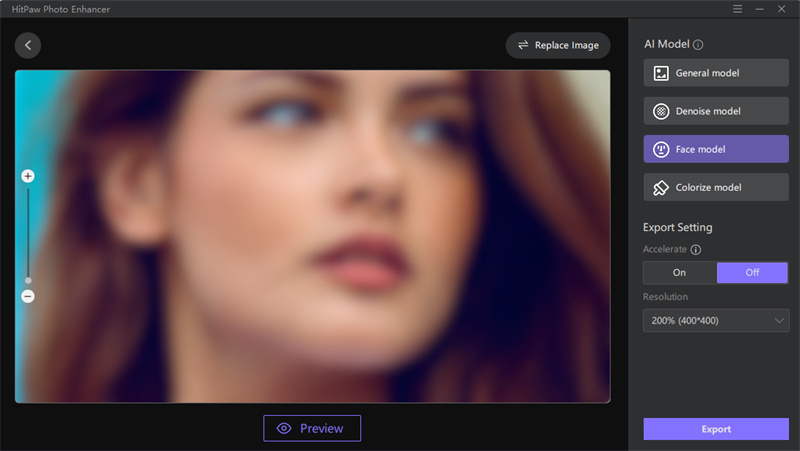
Step 3.Click on “face model” mode.

-
Step 4.After that, check the image to see if you’re satisfied with the results.
-
Step 5.Done deal to remove blemishes Photoshop.
Conclusion
As much as we try to be, we cannot be perfect in our photos. But, to enhance the photos, you can use a photo enhancer tool to do tasks like removing blemishes from your skin. Although many remove blemishes Photoshop tools are available on the internet, nothing beats the HitPaw Photo Enhancer as it is super quick and can enhance photos in a batch.




Home > Photo Tips > Full Knowledge about How to Remove Blemishes Photoshop
Select the product rating:
Joshua Hill
Editor-in-Chief
I have been working as a freelancer for more than five years. It always impresses me when I find new things and the latest knowledge. I think life is boundless but I know no bounds.
View all ArticlesLeave a Comment
Create your review for HitPaw articles