How to Export Premiere Pro to MP4 in 2023 - Step by Step Guide with Pictures
Adobe Premiere Pro is one of the world's best and leading video editing software. It is used for converting and editing basic and often dull and mundane video to larger-than-life clips and is loved by all video editors as it is simple to use and comes with a variety of options to cater to every video editing need.
Well, Adobe Premiere Pro often creates and edits videos in different formats. Some of them are not even compatible with our devices and social media platforms, and we can't play them directly. That's why it is best to export every Adobe Premiere Pro project in MP4 format. MP4 format is one of the most used formats for videos and is compatible with every device and every social media platform.
Part 1. Follow The Steps Below to Save Adobe Premiere Project as MP4
If you are wondering how to save Adobe Premiere project as MP4, then you are in the right place, as we have created the best guide for you that will help you export Adobe Premiere video as .mp4 easily. We have attached images with every step so you can follow every step easily.
Step 1. Select your sequence
The question of how to save Adobe Premiere project as an MP4 is incomplete without sequence selection, as sometimes we don't want to save the whole project. We want to save a certain part of the project. Well, it all starts with sequence selection. All you have to do is go to the timeline panel and select the parts that you want to export.
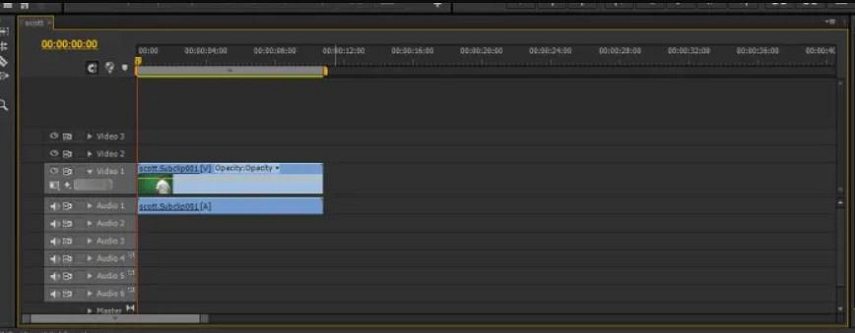
Step 2. Export the selected sequences
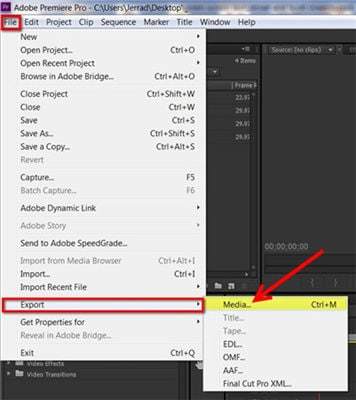
For all those who were wondering how to export a Premiere Pro project to MP4, this step is for them. Simply, all you have to do is click on the File Option in the screen's top left corner and select Export from the resulting menu and Media from the sub-menu.
Step 3. Choose the file format
Now, this step will change your project’s Adobe Premiere file extension to MP4 extension. Click on the Export Setting window and select a value compatible with your devices and all the social media platforms, which will change the premiere pro file extension to a highly compatible MP4 file extension.

Step 4. Select presets
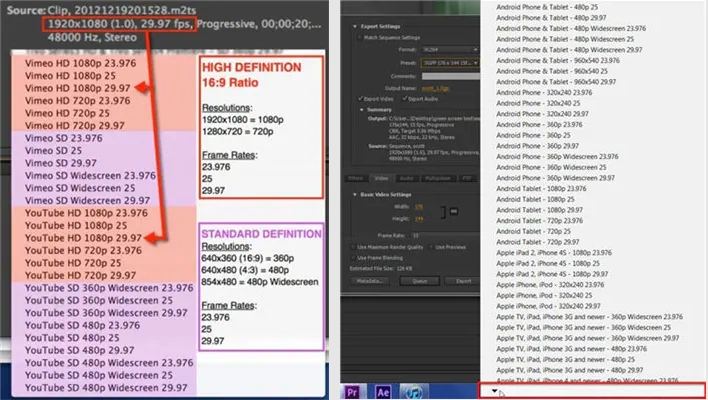
Usually, Adobe sets the preset on its own while converting Premiere Pro to MP4 but it is the best practice to set the presets by yourself or at least check the presets before moving forward with the conversion of prproj to MP4 as it will help you in putting a limit on the resolution of videos.
Click on the Preset Menu, and you will see a long list of Presets for devices like Android, iPhone, iPad, and Apple TV and apps like Youtube and Vimeo. Setting presets will help set a standard for your Premiere Pro MP4 project by fixing attributes for any prproj file.
Step 5. Name your project
Now we are quickly moving towards the steps that revolve around how to save premiere pro project as MP4 as we are done with deciding all the attributes part. In this step, you have to pick a unique and relevant name for your prproj and pick the location where you will store it.

Step 6. Export or queue your video
This is the last step, and since all the important tasks are done like, you have selected what you want to export, in which form you want to export and where you want to export. It is time to queue or export your file. Exporting is for all those who want to know how to save a Premiere Pro video as MP4 as exporting will immediately save your file to the decided location and takes a lot of the computer's memory, so always close all programs before exporting. While queue option will send your file to the Adobe Premiere Pro encoder program, and you can easily export multiple videos from there.
The exporting and queuing step marks the end of converting a video with a premiere file extension to MP4.

Part 2. Adobe Premiere Pro to MP4 FAQs
There are some common questions people have while using Adobe Premiere Pro, and we will answer all those questions to make any Premiere Pro save as MP4 easier for them.
1. How to save as MP4 in Premiere Pro with small size?
People prefer the MP4 format for various reasons. MP4 is compatible with every device and platform and allows storing metadata with any file etc. Another important reason for choosing MP4 over any other file format is that MP4 is highly compressible. If you want to know how to export premiere pro to mp4 in smaller file sizes without losing quality, follow these simple steps.
- Click on the File tab and then click Export and then Media.
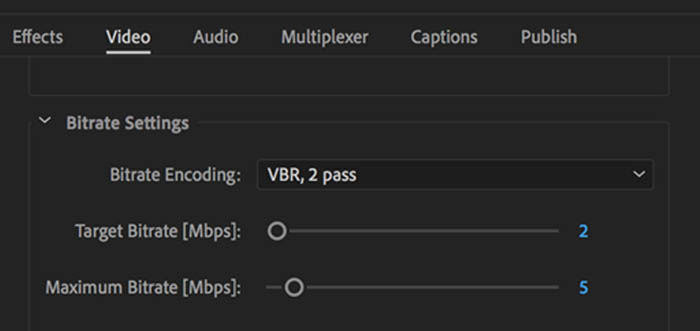
- You can set the video format to H.264 as it helps you get a compressed video without losing the quality and is the perfect format for any premiere video. Or you can set the Bitrate Encoding to VBR,2 Pass, as it also stores the video in a smaller size without losing the quality.
- Click on Export to download the MP4 format compressed video.
2. Why can't I import MP4 files into Premiere Pro?
We have discussed how to save as MP4 in Premiere Pro and export those MP4 files to devices and social media. However, we have not discussed how to import MP4 files into Premiere Pro and why we fail to import MP4 to Premiere Pro. The incompatible formats are the biggest reason we can’t import MP4 files from our devices to Premiere Pro. MP4 has a variety of formats, and sometimes our device format does not go well with the Premier Pro format. In that case, we need software that immediately converts our MP4 files to Premiere Pro’s most compatible format.
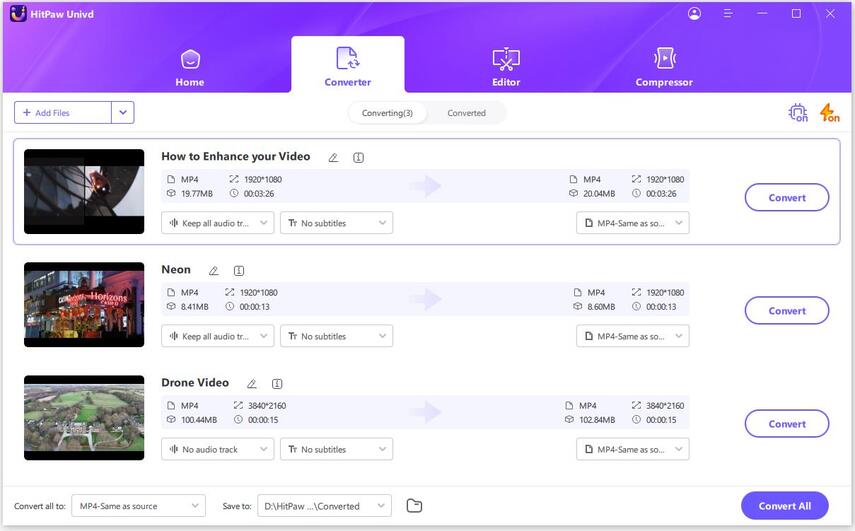
HitPaw Video Converter is a one-stop solution for all video conversion and editing needs. It can convert any video to more than 1000 formats at a speed that is 120 times faster than other similar services. HitPaw Video Converter works well with minimum intervention and can complete all tasks without much human monitoring with the power of batch processing.
How to convert mp4 videos to Premiere Pro compatible file formats
It is very easy to convert MP4 videos to Premiere Compatible file format. All you have to do is:
-
Step 1.Install and launch the HitPaw Video Converter on computer. Click on the Convert tab from the main menu
-
Step 2.Import your MP4 or other video files to the program.

-
Step 3.Select MP4 format from the output format list and click the Edit button to customize format parameters.
-
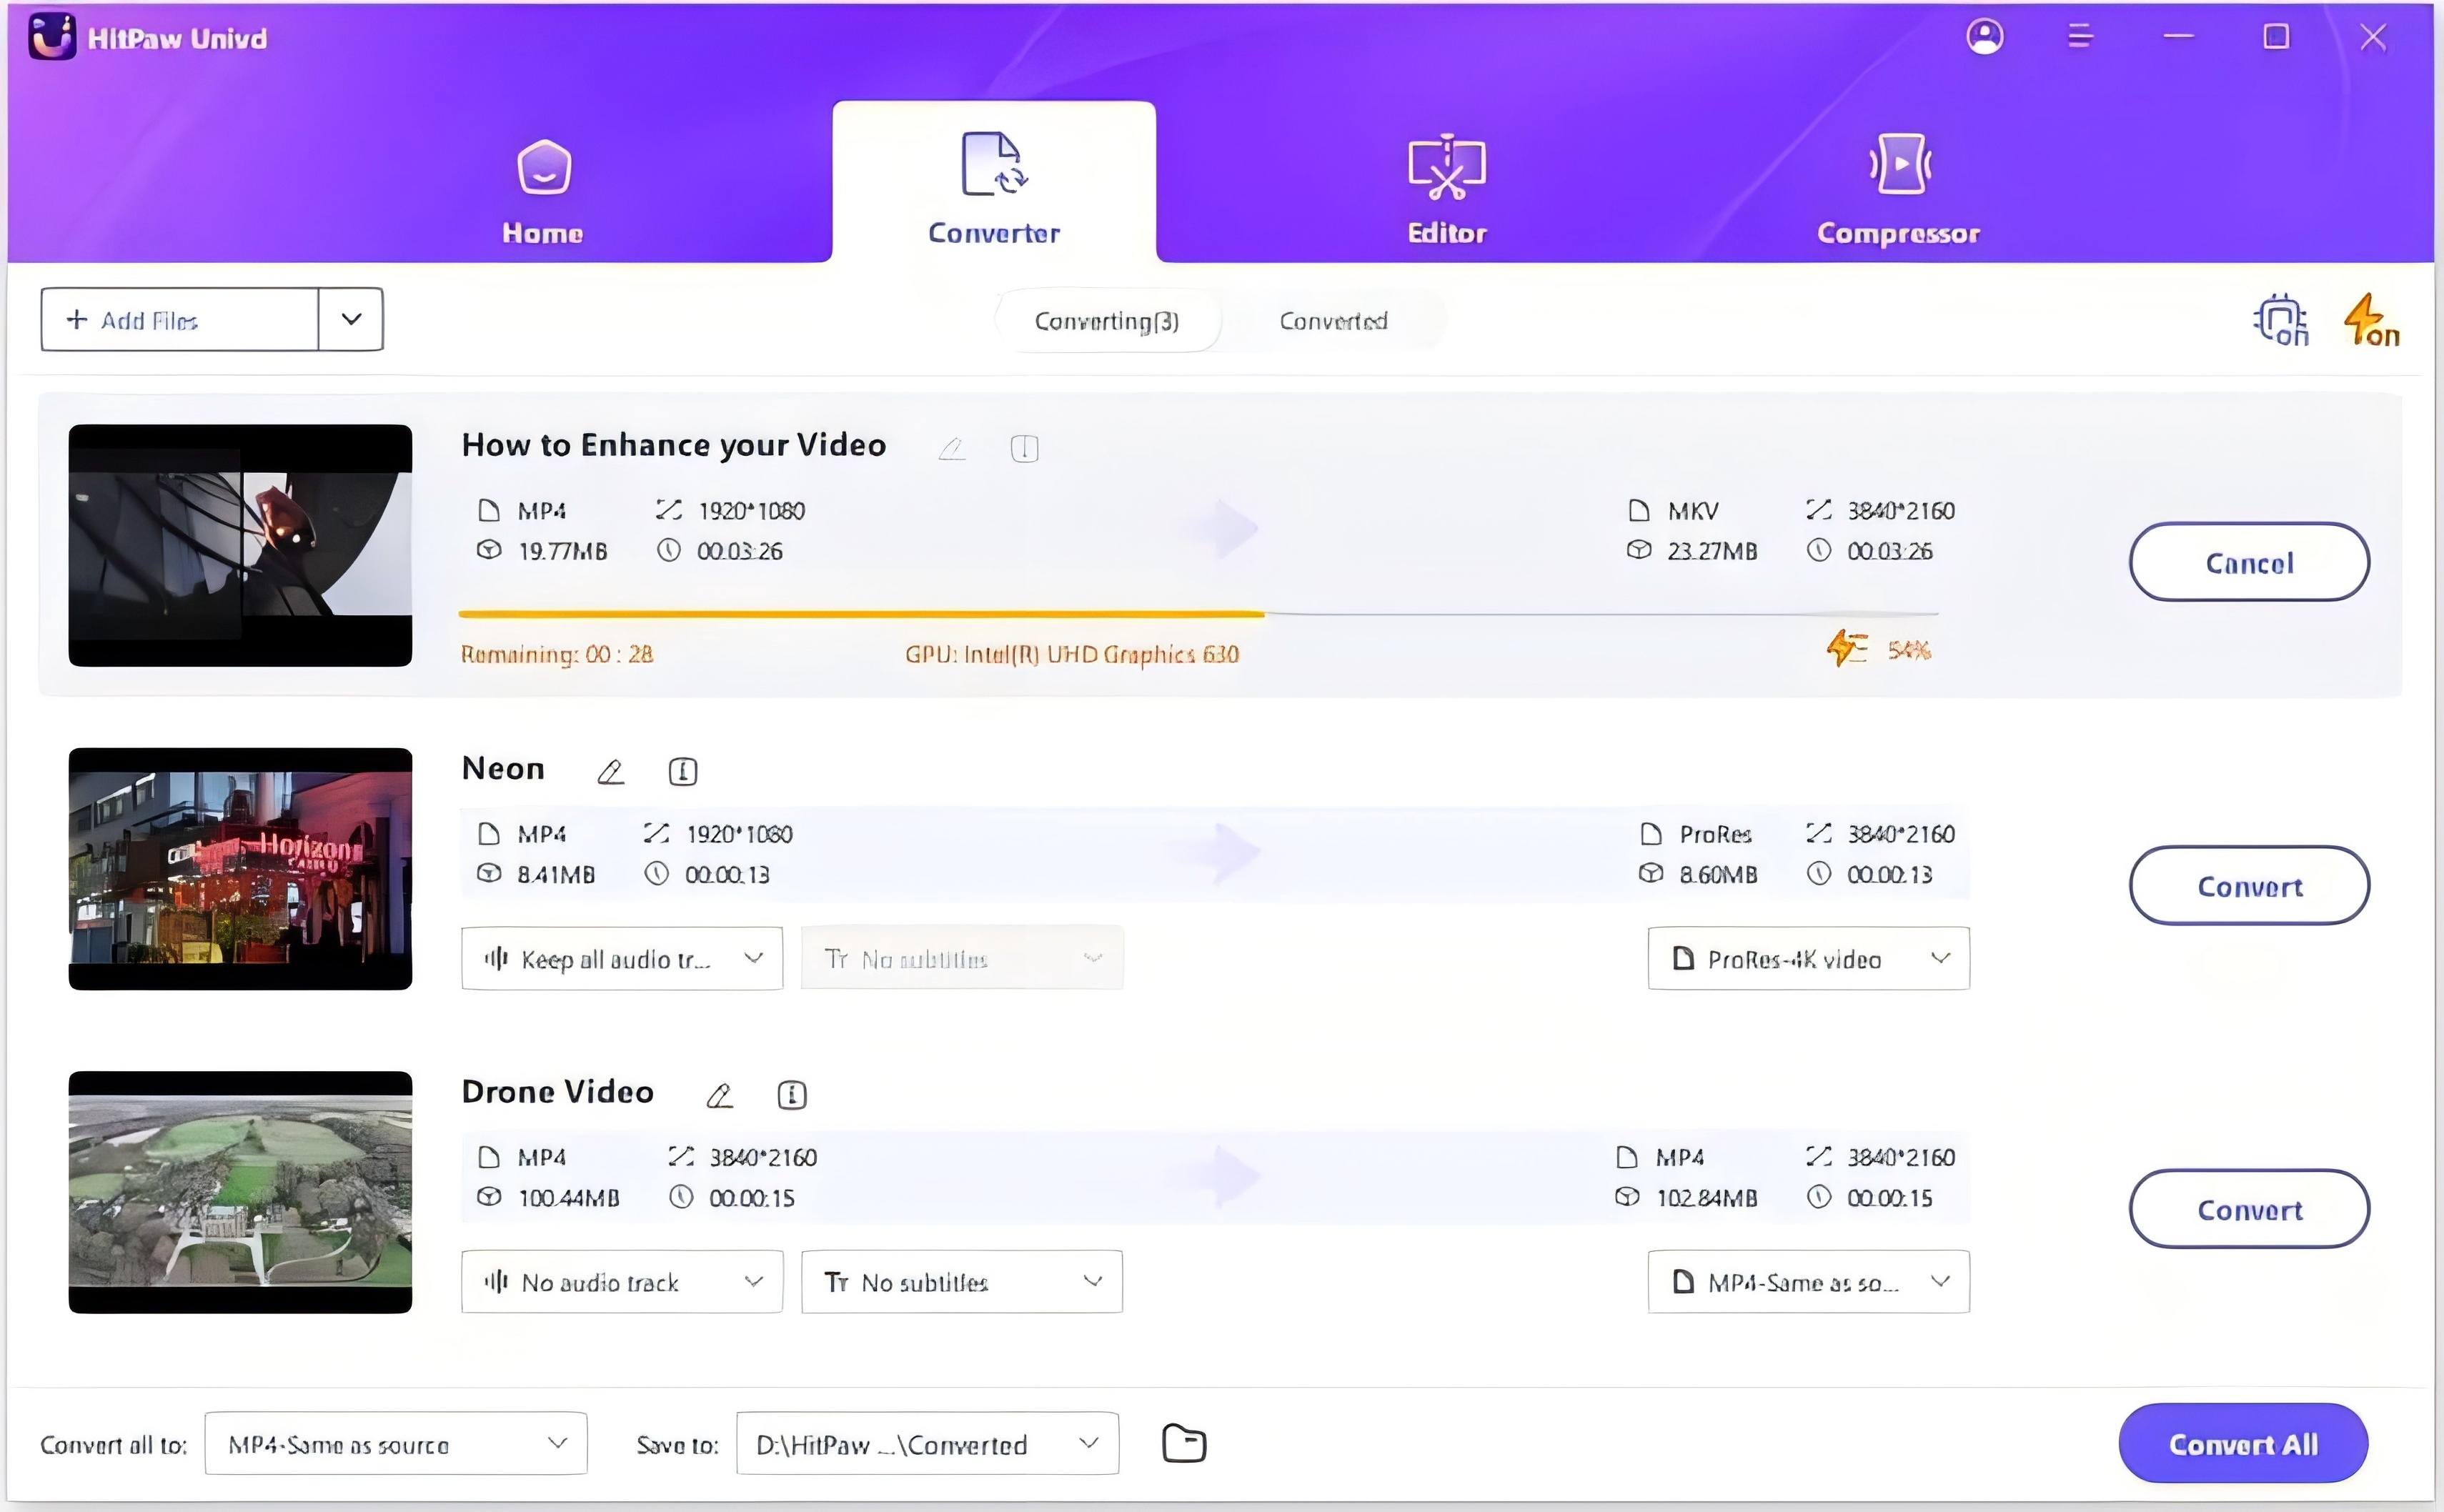
Step 4.Select ProRes from the Encoder options. This is the compatible codec with Premiere Pro.

-
Step 5.Back to the conversion sequence and click Convert button to start converting videos in 120x faster.

After conversion, you can import MP4 to Premiere Pro again. It should be no problem now.
The Bottom Line
Premiere Pro is great for every type of video editing and is used by a lot of people. Priemere Pro has a wide range of formats along with MP4, but most are incompatible with other devices, and you can’t post them on any social media. That’s why it is best always to convert your Premiere Pro projects to MP4 file format. We have shared our list of the best ways to convert Premiere Pro extension videos to MP4, along with answers to some most asked questions. If you have any problem with video compatibility, HitPaw Video Converter can help to convert videos lossless.





Home > Video Tips > How to Export Premiere Pro to MP4 in 2023 - Step by Step Guide with Pictures
Select the product rating:
Joshua Hill
Editor-in-Chief
I have been working as a freelancer for more than five years. It always impresses me when I find new things and the latest knowledge. I think life is boundless but I know no bounds.
View all ArticlesLeave a Comment
Create your review for HitPaw articles