How to Resize An Image on Mac with No Quality Loss
When you click the photos from different phone cameras, it becomes tough to get the desired results. Suppose you aimed to generate a photo at a horizontal angle but ended up creating it at a vertical angle.
What should you do here in this situation? You can resize an image on Mac, and guess what? This guide is set to reveal how to resize an image on Mac.
Part 1. [Top Choice] How to Quickly Batch Resize Images on Mac
You'll find hundreds of tools helping you resize and image on Mac. However, the issue many people face with tools is that pictures will probably lose their resolution. Luckily, you won't see any quality loss when compressing or adjusting the images on HitPaw Video Converter. It has a genuinely excellent image resizer for Mac that empowers you to adjust the images without losing photos' original shape.
So, if you're looking for a Mac app to change the resolution of multiple images-resizer-resize, HitPaw Video Converter might be your most reliable option. Apart from offering brilliant features and highly professional services, HitPaw Video Converter offers a simple user interface.
- It helps you resize an image on Mac with minimal effort
- Batch convert images, DVDs, audio, and videos
- It doesn't cause the photo quality loss
- It empowers you to edit the photos appropriately
- Supports multiple images formats
- Comes up with an effortless user interface, making it easy for newcomers
- Supports the 1000+ audio and video formats
- Allows you to download videos from 10000+ online websites
How to resize an image on Mac via HitPaw Video Converter?
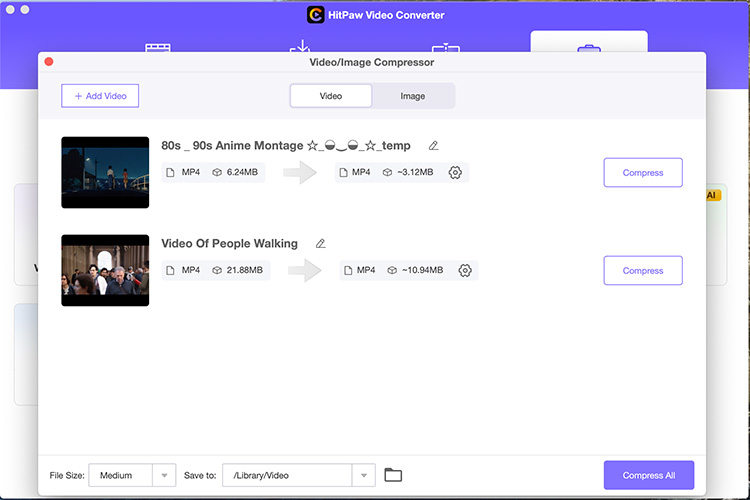
Step 1.Install the HitPaw Video Converter on your Mac and launch it without delay. Next, click on the Toolbox icon and select'' Video/Image Compressor''.

Step 2.Tap on the ''Add Image'' icon to import the photo you'd like to compress or resize. You can upload multiple photos to the main interface of HitPaw Video Converter, as it supports batch processing.

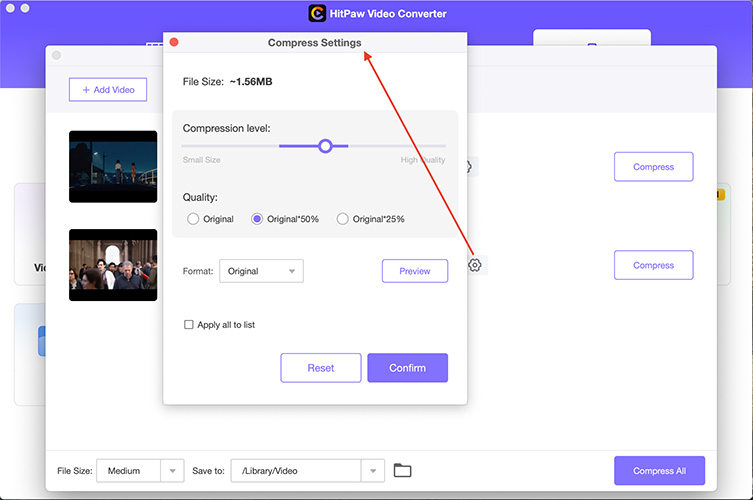
Step 3.Click on the gear icon and select an appropriate compression quality and level. After selecting the compression level, tap on the ''Apply all to list'' icon. Tap on the ''Confirm'' option to save the settings.

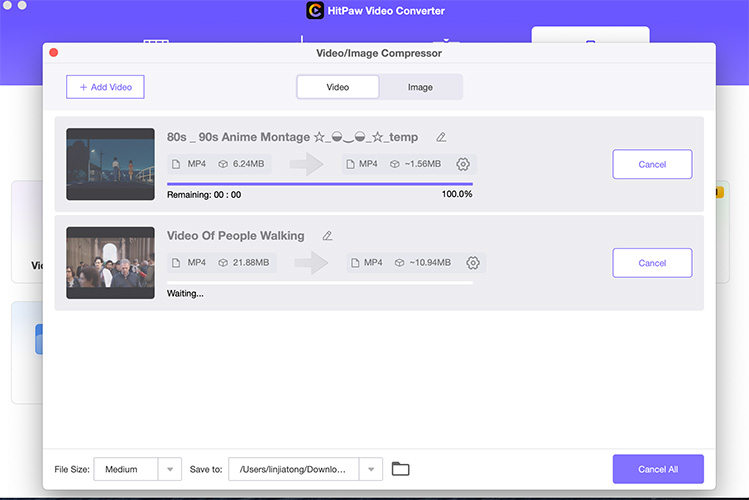
Step 4.The recommended compression level of your photos is medium. Next, click on the ''Compress All'' icon to begin compressing the images.

Part 2. How to Resize Images Using Preview on macOS
The preview app on the Mac PC is a highly underrated tool as it can help you edit your photos immensely. Hence, if you intend to resize image on Mac, the Preview app might come in handy. Here's how to resize an image on Mac.
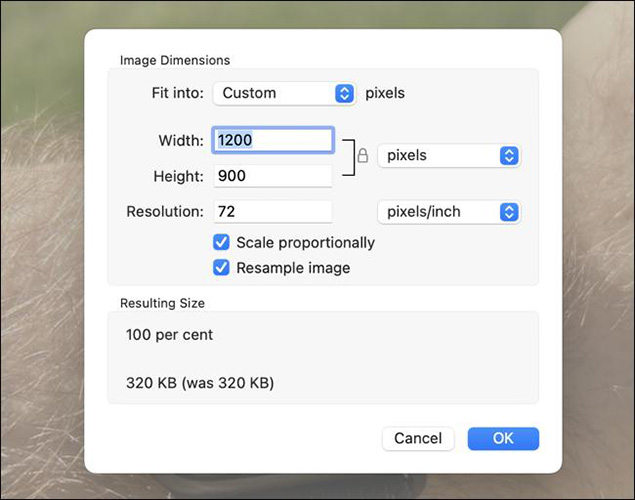
Step 1.To begin with, you'll need to launch the photo on the Preview app. Next, select the Adjust Size icon after tapping the Tools icon.
Step 2.After entering this dialog box, you adjust the size of your image brilliantly. You're recommended to keep the scale proportionally checked, as it allows you to adjust the width and height automatically.
Step 3.After adjusting the image size, click on the'' OK'' icon to save your file.

Part 3. How to Resize Image on Mac using Pages
Another way to resize images on Mac is through Pages. It is a straightforward method to resize an image on Mac. Here is how to resize image on Mac.
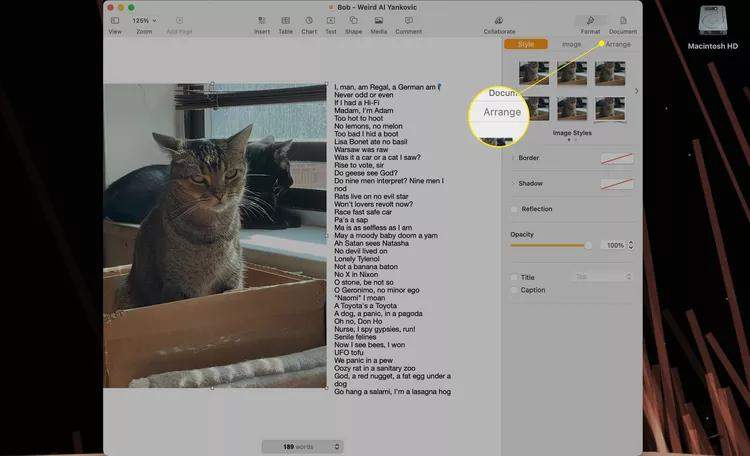
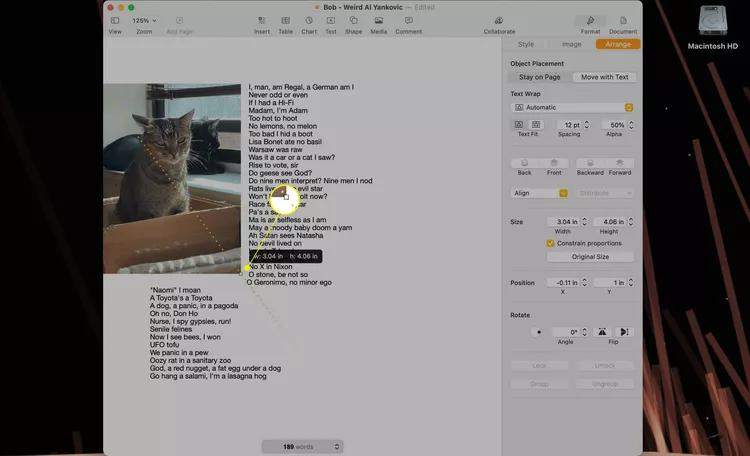
Step 1.Select the image in the Pages document and choose the ''Arrange'' icon.

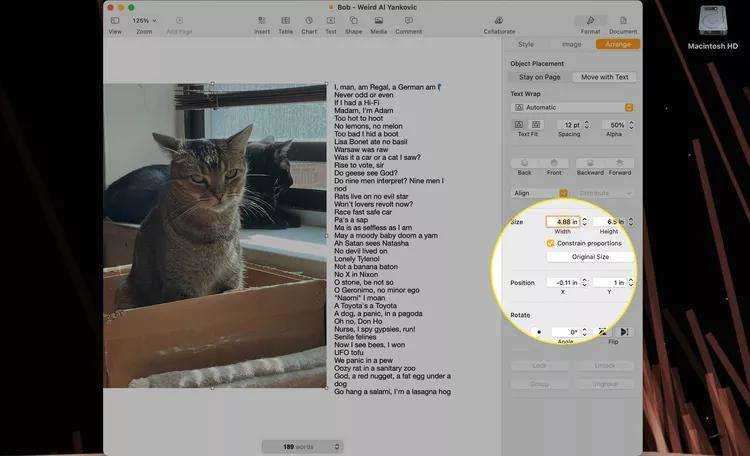
Step 2.Navigate to the Size icon.

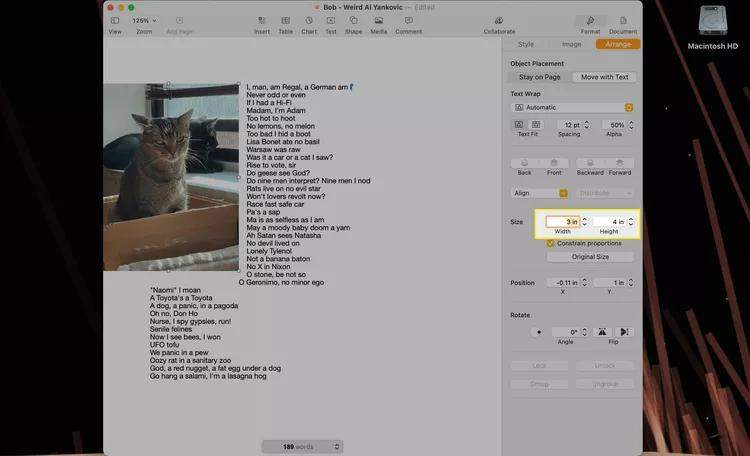
Step 3.Click on the '' Return'' icon after entering the new value in the Height or Width.

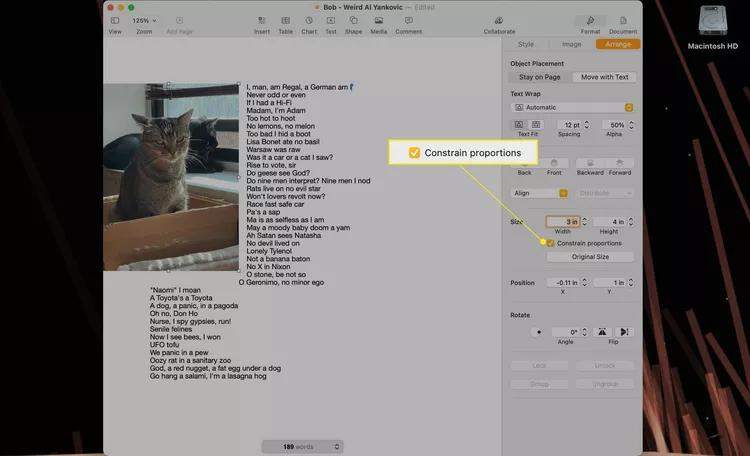
Step 4.If Constrain proportions have been checked off, you must tinker with the value of Height or Width to change the image's dimensions.

Step 5.You can also resize the photo with the trackpad or mouse until it fulfills your requirements.
Step 6.After selecting the image, you must move the mouse cursor to the white boxes on the corners or sides. You can turn a single arrow cursor to a double sided arrow.

Step 7.When you see a double-sided arrow, you'll need to tap and drag the photo's edge to make it smaller or larger. If you checked off the Constrain proportions, your image would be resized automatically.
Part 4. Resize Images to a Set Size With Automator
If you run a blog, converting the images to a specific height or width is common. Automator is a brilliant tool that empowers you to resize photos to the desired size. Here's how to resize an image on a Mac via Automator.
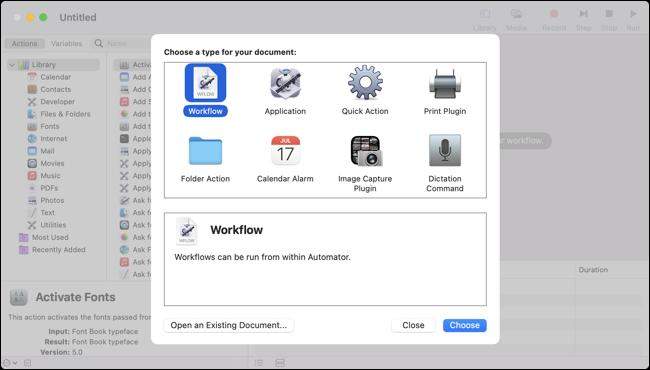
Step 1.Select ''Quick Action'' after launching the Automator.

Step 2.After navigating the workflow area, alter the '' Work Receives Current'' icon to the ''Image files'' icon. Proceed ahead by specifying the Finder as your application.

Step 3.Select an icon you want to associate with your action after hitting the ''Image'' icon. Next, you'll need to colorize your color accordingly.
Step 4.After visiting the ''Finder'' group, drag the ''Get Specified Finder Items'' to the workflow menu.

Step 5.Import the ''Scale Images'' to the workflow after hitting the ''Photos'' group. Next, you might have to specify the size either by percentage or by Pixel. If selecting the pixels, remember that that will apply to either axis. Next, save the Quick Action after hitting the '' Command+S'' icon.
Step 6.Right-click on your image file in the Finder icon to use the action. Next, select''Quick Actions'' before selecting your generated workflow.

Final Saying
Resizing an image on Mac becomes difficult, especially when you need help finding the quality tools that serve your purpose. You can read this guide to learn how to resize an image on Mac, as we've listed the brilliant tools to get your job done. Among the tools we've come up with in this post, HitPaw Video Converter is easily the best. It allows you to batch-resize images Mac without affecting the photo quality.




Home > Photo Tips > How to Resize An Image on Mac with No Quality Loss
Select the product rating:
Joshua Hill
Editor-in-Chief
I have been working as a freelancer for more than five years. It always impresses me when I find new things and the latest knowledge. I think life is boundless but I know no bounds.
View all ArticlesLeave a Comment
Create your review for HitPaw articles