Best Screen Recorders with Audio for Windows/Mac/iPhone/Android
Have you been in a situation where a friend or family member is asking how to do something on their phone or laptop, and no matter how much you explain they just do not understand? You wish you could just show them, and now you can achieve that with screen recording. Not only will it show what you are doing on your screen, but it also has audio. So now you can share your screen with anyone, friends, family, and co-workers.
In today's post, we're going to review some of the best screen recorders which capture screen as well as sound (your voice). And if you're looking to record screen with audio that comes from your device easily, then you can directly go for the last option in part 5.
Part 1: Windows Screen Recorder with Audio
On a windows computer, you can either record screen and audio by using software or using the inbuilt screen recorder. For the latter one, it requires you to have Windows 10 installed on your computer. Following are the steps to record screen with sound by using the Xbox game bar.
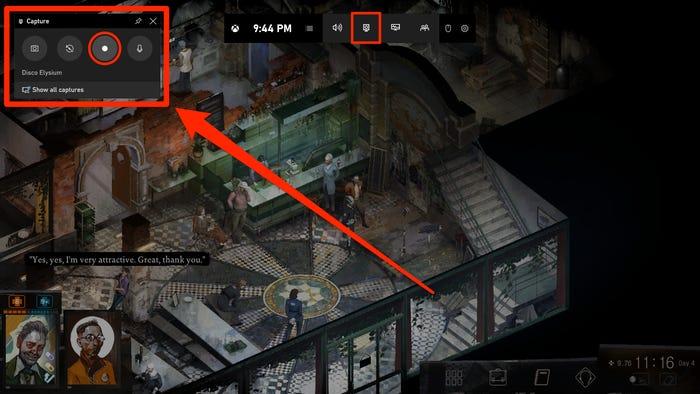
- Open the Windows game bar by pressing the Windows + G keys. If it does not open via the shortcut you may need to enable the game bar in settings first.
-
The recording tool should be in the top-left corner of your screen by default. If it does not appear you can find the record button by using the toolbar located at the top of your screen.

- Simply click on the microphone button on your screen, and it will begin recording using your default microphone settings.
- To end the recording session, you need to click the stop button on the recording timer which is running or use the game bar menu.
The video will be saved as an MP4 file in the Capture folder under the Video folder. The entire process is quick and easy to understand.
Part 2: Record Screen and Audio Mac
MACs are equipped with a screen recorder that records screen with audio.
Way 1: Using Screenshot Toolbar
-
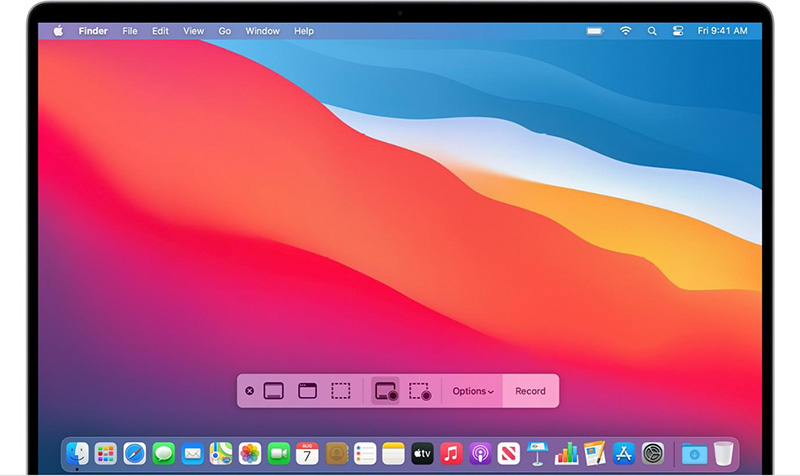
To begin recording on your MAC you need to use the screenshot toolbar. Press shift, command, and the 5 keys together. You will then be given the choice to record the whole screen part of the screen or to take a screenshot.

- For a full-screen recording, select the button that looks like your mac screen with a recording circle on its lower right side. You can then click the record button or click on any screen that you wish to begin recording.
- To end the recording, you need to click on the Stop icon provided in the menu, or alternatively, you can press the command, control, and escape keys together.
Way 2: Using QuickTime Player
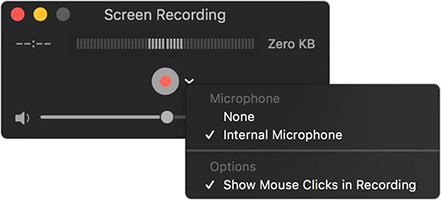
Another way of screen recording on your MAC is by using the QuickTime player application that comes with your MAC.
-
Go to your application folder, select the file option then select the new recording from the menu. Then either the controls will show up or a screen recording window will appear.

- You can change the recording setting before starting recording.
- Then click the record button, you can then click on the screen to begin recording or start recording in a select area for a partial screen recording.
- To end the recording, you simply need to click the Stop button or press the control, command, and escape keys simultaneously.
Part 3: Record Screen and Audio on iPhone
Screen recording is not just limited to a computer, it can be done on phones as well. Any iPhone with iOS 14 or newer is capable of screen recording with the built-in feature.
-
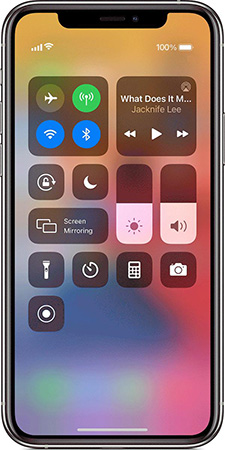
To begin, you need to go to Settings and select Control Centre, then select Mote Controls, then tap on the Plus icon beside the screen recording option.

- Then you need to open the control center on your phone, long tap the record button and then tap on the microphone icon. After the 3-second countdown, your phone will begin recording.
- To end the recording, you can reopen the control center and tap the recording button again or tap the red bar on the top of your screen.
Alternatively, you can plug your iPhone into your MAC and use the QuickTime option to screen record your phone screen. The only difference is that you must choose your iPhone as the video source. Other than this, the process is the same as that used for screen recording on a MAC.
Part 4: Screen Recorder with Audio on Android for Free
Due to the diverse brands of Android phones, you may not have the choice to record screen with audio using the pre-installed recorder. In such a case, you can get apps that work as a screen recorder.
In this part, we'll pick several tools for you. Read on.
#1 AZ Screen Recorder
One of the apps is the AZ Screen Recorder, which is a highest-rated and widely-used screen recording app for android phones.
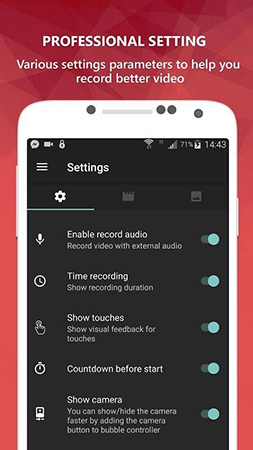
All it requires you to do is open the app and begin screen recording. It automatically exports the recorded video to your phone gallery, you can also choose to save the video to the apps gallery.
#2 OneShot Screen Recorder
Another app is OneShot Screen Recorder. It is a free screen recording app available for android users.
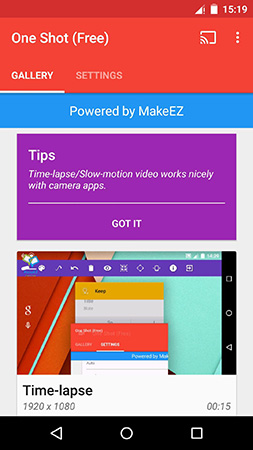
You just need to go to the Google Playstore, download the app and begin using it to screen record.
Part 5: Screen Recorder with Audio and Facecam (Recording Windows & Mac & iPhone/iPad Screen)
If you would like to have software on your desktop for screen recording, then you cannot go wrong with HitPaw Screen Recorder. It not only records your screen, but also the sound that comes from the computer or your voice. It also features picture in picture recording. You can take a screenshot anytime while recording. The most important is that it allows you to edit the video after recording.
Follow the steps below to record screen with audio using HitPaw
The first step is to go to the official site of HitPaw, then download and install the HitPaw Screen Recorder software.
-
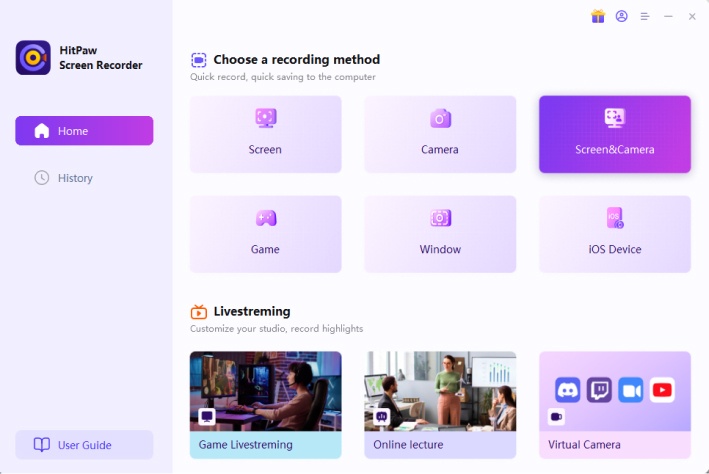
Open HitPaw Screen Recorder, and choose the "Screen" option.

-
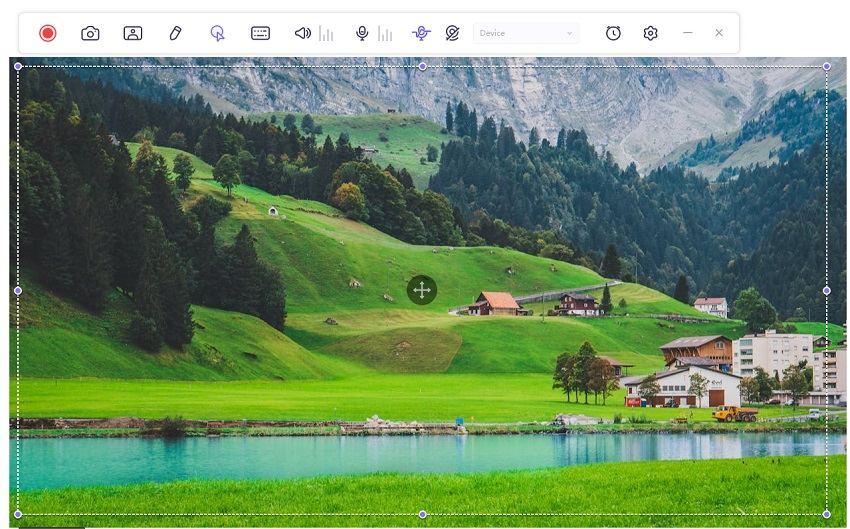
Select the area to record by long-pressing and dragging your mouse. You can also adjust the screen size with the choices in the lower-left corner of the menu bar.

-
To begin recording, click the Record button; to stop recording, click the same button again. If you need to take a screenshot, the button next to Stop is a convenient way to do so; give it a try if necessary.

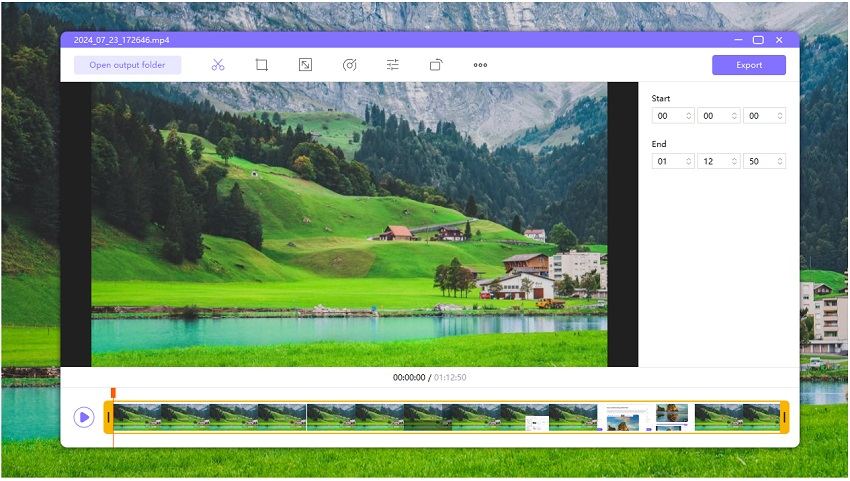
When you click the Stop button to end the recording, the software will instantly take you to the editing interface. Trim your video with a single click or inspect it immediately in the output folder.

HitPaw provides its user with a quick and user-friendly way of screen recording with audio. It also provides the option to record a certain amount of the screen as opposed to other software that records your screen.
Conclusion
There are a variety of ways to record screens with sound for windows, Mac, and smartphones. If you choose an external software either because your computer does not have self-recording capabilities or you simply do not like the quality of the software you have, have HitPaw Screen Recorder a try.





Join the discussion and share your voice here
Leave a Comment
Create your review for HitPaw articles